Tuesday, March 30, 2010

Better Beef Lasagna

I am a sucker for great Italian food. If it were up to me, I would eat Italian food every single day. Not necessarily every single meal, but certainly every day. Just imagine---okay, I need to stop because the drooling is affecting the effectiveness of the keyboard keys. Anyway, when we decided to go with an Italian theme, I immediately thought of lasagna because its delicious, wonderful, yummy, scrumptious---oh, crap, drool problem again.

One bad aspect of lasagna, however, is that it's usually loaded with fat and calories because of the beef and sheer excess of cheese used. Another drawback being time. Lasagna is so time consuming to make because there are just so many steps. I felt like this recipe by Elie Krieger, whom I love by the way, appropriately met my biggest concerns.

I made this recipe for a potluck for my small group and was really quite anxious. There's just a tad bit of pressure when you don't normally "cook" (yay baking!), and you're the one in charge of the entree (READ: if you screw up, everyone's screwed). Good times! But everything turned out decently.

Don't be alarmed by the intermediate level difficulty of this recipe, it isn't too bad actually. Or maybe I was just expecting a war and it turned out just fine. It really did take around the time described below to prep and cook. One of the things I don't like the recipe calls for 4 cups of marinara, but when you're in the store...well, I didn't know how much that was and hoped it was around a jar size. In actuality, I ended up running short on sauce and I wonder if that contributed to my lasagna being a little dry. It definitely isn't the dripping, saucy mess that you're used to from lasagna, but this is supposed to be healthier. I bought a nice, organic marinara from Trader Joe's and it tasted beautifully. I was surprised the meat and lasagna tasted pretty well spiced when the recipe doesn't call for extra spices. I did however end up adding a few pinches of dried oregano to the top of the lasagna when I added the last layer of sauce and cheese. It smelled so good when it baked--the drooling started all over again.

All in all, I think this turned out well. I ended up using 95% lean beef because I couldn't find 90% lean and it worked, in fact the beef taste was better for it. I also mixed up portobello and crimini mushrooms because all portobellos was out of my budget range. I think what messed up my version was that I baked it and then stopped to refrigerate it because it was too early. Then I had to rebake it and I think this reheating/double baking dried it out a little bit. It really could have used that extra sauce. I also added more mozzarella and used regular Parmesan instead of Fresh. Yummy! Great recipe, happy eating!


A peek at the lasagna---so ghetto with the foil covering it, ha!

4 stars out of 5 (would have been 4.5 if it wasn't dry)
_________________________


Recipe from here.

Recipe courtesy Ellie Krieger
Prep Time:35 min, Cook Time:1 hr 15 min
Level:Intermediate
Serves:6 servings
Ingredients
  • 12 ounces whole-wheat lasagna noodles (15 noodles)
  • 8 ounces lean ground beef (90 percent lean or higher)
  • 2 teaspoons olive oil
  • 8 ounces portobello mushrooms, diced (about 3 large mushroom caps)
  • 4 cups good quality store-bought marinara sauce
  • 1 (15 ounce) container part-skim ricotta cheese
  • 1 (10 ounce) package frozen chopped spinach, thawed and well drained
  • 1 egg, lightly beaten
  • 1/2 teaspoon salt
  • 1/2 teaspoon freshly ground black pepper
  • Pinch ground nutmeg
  • 1/4 cup grated Parmesan
  • 3 ounces grated part-skim mozzarella cheese (about 2/3 cup)

Directions

Preheat the oven to 375 degrees F.

Cook the noodles al dente according to the directions on the package. Drain them well then lay out on waxed paper to prevent them from sticking to each other.

Heat a large nonstick skillet over a medium-high heat. Add the beef and cook until no longer pink, breaking it up into small pieces as it cooks, about 3 minutes. Transfer the meat to a plate, discarding any fat remaining in the pan.

Add the oil to the same pan and heat over a medium-high heat. Add the mushrooms and cook, stirring occasionally until all the liquid has evaporated and they begin to brown, about 5 minutes. Return the meat to the pan. Stir in 2 cups of the tomato sauce and simmer for 2 minutes.

In a medium bowl combine the ricotta cheese, spinach, egg, the salt, the pepper and nutmeg.

Spread 1 cup of tomato sauce on the bottom of a 9 by 13 inch baking dish. Place a layer of lasagna noodles on top, touching but not overlapping. Spread half of the ricotta mixture on top of the noodles. Add another layer of noodles. Top with half the beef-mushroom mixture. Repeat with another layer of noodles, then remaining cheese mixture, more noodles, then remaining beef mixture and finally 1 more layer of noodles. Top the final layer of noodles with the remaining sauce, then sprinkle with the grated cheeses. Cover loosely with foil and bake for 45 minutes. Uncover and bake for 15 minutes more.

Monday, March 29, 2010

Homemade Cinnamon Sugar Pita Chips

Yes, it's been forever. Sorry! I kept saying I would post up a bunch more recipes, but then I got really busy and went away this weekend so it turned into zero time to post or even bake for that matter. Thanks for your patience! Back to cooking...

Wow, I've been saying I'd post this for so long now I don't even remember what song I listened to when I made this. I think I was listening to the Sookie Stackhouse book on CD.


Anyway, this recipe is super easy and it's so nice that you have more control over the foods in your life. I made these with organic white wheat and corn tortillas I bought at Trader Joe's. One thing's for sure, these are better for you and have no preservatives because I left a few tortillas and they went bad within the week when I left them out. The weather was pretty cool that week too.


I changed the recipe by adding in some nutmeg along with the cinnamon and sugar. Actually, to be honest, I think I added too much, so I'll have to dial that down next time. The baking time is off too. I just baked it til the chips started to curl. I felt like that was a better indicator.

These turned out delicious and really were quite easy. Oh! And Today, I have my own
pics! So all the pictures below were from my point and shoot. Enjoy!


The package of delicious tortillas I used, cut into slices.


The finished product in all its glory! Yum!

4 out of 5 stars!

________________

Recipe from here.

Ingredients

Directions

  1. Cut tortillas into 8 wedges.
  2. Brush or spray baking sheet with oil.
  3. Arrange tortilla wedges in a single layer on the baking sheet and brush or spray lightly with oil.
  4. Sprinkle with seasonings: salt or seasoned salt, chili powder, cinnamon sugar, etc.
  5. Bake at 325 until crisp and lightly browned, approximately 10 minutes.

Monday, March 22, 2010

Matcha Cupcakes (aka Green Tea Cupcakes)

Cooking Song: "California Love" - Tupac

Yes, that's right. We listened to gangsta rap while baking. That's how I roll.

First of all, I should start off by saying what we made looks nothing like the pictures below. Stupid me forgot to take pictures of it, I really should have. I made these with my friend M last week and had quite an adventure.

We started off having problems at the very beginning because beating butter and sugar together with a hand mixer, and not a great hand mixer, is hard to begin with. Oops, ended that sentence with a preposition, oh well. Butter and sugar pieces get all over the place and then add to that the fact that we were mixing in a shallow bowl---yea, okay, you get the picture. We decided to prematurely add in the eggs because we figured a little liquid would help the process. To a certain extent, we were right. It did help, but it was still annoying and piece-y. I added in the flour mixture a portion at a time because the mixture became so thick it was difficult to mix. Even if I had a better hand mixer the mixture was still extremely difficult to work with. Obviously this made filling the baking tin a lengthy process, in and of itself. The batter was simply an unwieldy batter which seemed to resent being handled.

This recipe actually only turned out about 18 cupcakes. Maybe we made them too big? M had a nice baking tray that were upside down rose shapes and those turned out beautiful, even though I've yet to see a green rose. They were a beautiful light golden brown...green. :)

Even though these looked quite interesting, they tasted wonderful, however nothing like cupcakes. They were more scone in consistency and that may have been in part to the fact that we didn't spoon flour into the measuring cup as is the standard. But still, three cups of flour is quite a lot. I was also surprised at the large quantity of sugar as well (not to mention butter), but we imagined it had to do with balancing out the natural bitterness of the Matcha. I've never thought to cook with Matcha Tea so this was an entirely new and fun experience for me.

We didn't even bother making the frosting, the scone-cupcakes were sweet enough on their own, and too dense anyway to be cupcakes. It really just wasn't necessary.

With that said, I would not make this again. The batter was maddeningly thick and annoying to handle. The sheer quantity of butter, flour, and sugar in this recipe was also a little too much for me. But overall, it did taste quite good.

4 stars out of 5 (docked for annoying batter-ness).
_____________________________

Below from here.


Matcha Cupcakes
from Cupcake Bake Shop by Chockolyt
Matcha Green Tea Cupcakes

* 24 cupcake papers or 1/2 sheet pan / 350 degree oven
* 1 cup (2 sticks) unsalted butter, room temperature
* 2 cups sugar
* 2 large eggs
* 2 large egg yolks
* 3 cups all-purpose flour
* 2 teaspoons baking powder
* 1/8 teaspoon salt
* 1 cup milk
* 2 tablespoons matcha tea

For Cupcakes

* Beat butter on high until soft, about 30 seconds.
* Add sugar. Beat on medium-high until light and fluffy, about 3 minutes.
* Add eggs/egg yolks one at a time, beat for 30 seconds between each.
* Whisk together flour, baking powder, and salt in a bowl. Add to batter and mix to combine.
* Mix matcha in with the milk. Add to the batter and mix until combine.
* Scoop batter into prepared into cupcake papers.
* Bake for 22-25 minutes until a cake tester comes out clean.

Tuesday, March 16, 2010

Carrot Cake Cupcakes with Cinnamon Cream Cheese Frosting

*UPDATED 3/29/10*


My uploaded picture! This is why you need cupcake carriers--so you don't go ghetto by putting a few in each tupperware and then have the foil smear the frosting all over!
*END*
__________________________
Recipe Song: Silence.

Thought I would try something new, and the silence was relaxing in its own right.

Continuing my crazy cooking Thursday, I made these absolutely delicious cupcakes on Friday for my mom's birthday. She absolutely loves carrot cake, so I thought it would be fun to make cupcakes for her and her coworkers.

This is actually a really simple recipe. From start to finish, it took me less than 2 hours, including baking, making the frosting, and clean up. In my book, that's fast. I know I'm definitely not the fastest baker/cook so adjust your prep and bake times accordingly. I bought pre-grated carrots just to make my life easier and then blended them in a blender to make them finer. I don't like eating carrot cake where little bits and strings of carrots come out when you bit into the cake. I did use walnuts as well and blended those into smaller pieces as well. When you don't have a food processor, the blender is a handy tool to have indeed.

Other changes I made to the recipe are as follows: I used Greek strained plain low fat yogurt as opposed to regular low fat yogurt, Fage to be specific. It's my favorite plain yogurt brand. I didn't taste the sourness at all in the end product, so I don't think it makes any difference. I actually made this recipe again on Monday and used a different brand of low fat plain yogurt and it tasted the same. I also primarily bake with salted butter and then don't add the additional salt the recipe calls for (one of my girlfriends, Annie, taught me that one).

For the frosting, I used 1/3 less fat cream cheese and went crazy and did the 1/2 tsp cinnamon. The frosting is so good, I really could have just eaten it plain with no cupcakes. Finger-lickin', indeed. I tried to pipe my frosting out of my own makeshift sandwich bag turned piping bag but I miscalculated the hole I cut and it ended up too big. That was an interesting experience, lol.


The most important thing to pay attention to in this recipe is that it makes a perfect 12 cupcakes. I don't know why the recipe says it makes 18, but I, as well as many other of the commenters, had a different experience. But as I said, absolutely delicious! Huge hit. Happy eating!

5 out of 5 stars!
______________________________

Below from here:

Carrot Cupcakes with Cinnamon Cream Cheese Frosting

Prep Time: 30 Minutes
Cook Time: 25 Minutes
Servings: 18
Difficulty: Easy

Ingredients

  • 1-½ cup All-purpose Flour, Spooned And Leveled
  • 1 teaspoon Baking Powder
  • ½ teaspoons Baking Soda
  • ¾ teaspoons Salt
  • ½ teaspoons Ground Cinnamon
  • ¼ teaspoons Ground Ginger
  • ¼ teaspoons Ground Nutmeg
  • ¾ cups (1 ½ Sticks) Unsalted Butter, Melted
  • 1 cup Packed Light Brown Sugar
  • 1 whole Large Egg
  • 2 Tablespoons Lowfat Plain Yogurt
  • ½ teaspoons Vanilla Extract
  • 1-½ cup Grated Carrots (about 3 Or 4 Medium Carrots)
  • ¼ cups Diced Walnuts (optional)

    Cinnamon Cream Cheese Frosting
  • 8 ounces, weight Organic Neufchatel Cheese, Room Temperature
  • ¼ cups (1/2 Stick) Unsalted Butter, Room Temperature
  • 1 cup Confectioners’ Sugar
  • 1-½ teaspoon Vanilla Extract
  • ¼ teaspoons Or 1/2 Teaspoon Ground Cinnamon

Preparation Instructions

Cupcakes:

Preheat oven to 375 degrees. Line a 12-cup standard muffin tin with paper liners.

In a large bowl, whisk together flour, baking powder, baking soda, salt, cinnamon, ginger and nutmeg; set aside.

In another large bowl, whisk together melted butter, brown sugar, egg, yogurt, and vanilla. Stir in carrots and walnuts (if using). Gradually add dry ingredients to the butter mixture until well combined. Divide among muffin tin. Bake for 25 minutes, rotating pan halfway through until a toothpick inserted in the center comes out clean.

Let cool on a wire rack in the pan for 5 minutes. Then remove from the pan to a wire rack to cool completely before frosting.

Cinnamon Cream Cheese Frosting:

Using an electric mixer, beat cream cheese, butter, and confectioners’ sugar until smooth; beat in vanilla and cinnamon. Top each cupcake with 2 tablespoons of frosting and spread to cover. You can also pipe the frosting onto the tops of the cupcakes.

Monday, March 15, 2010

Low Fat Spinach Artichoke Dip

*UPDATED 3/29/10*

Sorry for the ugly picture. I hate using flash, but it was necessary this time around. It looks a lot less runny than the recipe's picture because I used more cream cheese. At least...I think that's why. :)

*END*
__________________________

Recipe Song:
Dead and Gone, audiobook by Charlaine Harris.

As part of my crazy cooking Thursday last week (I made this, the momofuku cookies from yesterday's post, as well as something else I'll post about later), I made this lovely spinach artichoke dip. Yea, the picture below isn't so appetizing, but I haven't uploaded any of my pictures from my lovely cooking last week, so you'll have to contend with that. Sorry! Muahaha.

Anyway, I had an interesting issue with this recipe. As you notice, it calls for low fat and fat free cream cheese. Well, after going to a few different grocery stores, none of which carries fat free cream cheese, I found out that hey, there's no fat free cream cheese. So I used all 1/3 less fat cream cheese and stupidly, none of those packages comes in a 6 ounce size, which angered me to say the least. It reminded me of the nonsensical way hot dogs and buns are sold. I don't eat cream cheese at home, so I just figured I'd use both blocks of cream cheese, regardless of what the recipe said.

Dang, I'm glad I wasn't baking. Cuz that wouldn't fly if I were.

So, the deal with adding more cream cheese is that I must now in turn add more of other things like sour cream and mozzarella and then---yea, I didn't. I think that was one downfall of the finished product. It was cream cheese taste heavy. So that was unfortunate. However, when it was all heated up thoroughly, it was really quite delicious. The dip is so creamy you'd never know you were missing so much fat, except that there is no unappetizing layer of oil sitting on top.

Another thing, I actually tore up the spinach and pulled all out the stems of every leaf. Huge waste of time. Next time I think I'll lightly
chiffonade the spinach so I don't waste so much time hand tearing. This recipe makes a lot, so if there's only a few of you, think about cutting it in half or so.

Overall, delicious. Add some pita, chips, or bread and you're good to go.

4 out of 5 stars.

____________________________
Below from here.

20100201-artichokedip.jpg


Spinach and Artichoke Dip

- makes about 10 servings of about 1/2 cup each -

Adapted from Cooking Light.

Ingredients

10-ounce bag fresh spinach
6 ounces (3/4 block) 1/3-less-fat cream cheese, softened
6 ounces (3/4 block) fat-free cream cheese, softened
1/2 cup fat-free sour cream
1 1/2 cups part-skim mozzarella, shredded
1 (14-ounce) can artichoke hearts, drained and chopped
1/4 teaspoon freshly ground black pepper
3 garlic cloves, crushed (not minced)
6 tablespoons shredded parmesan cheese, divided

Procedure

1. Preheat oven to 350°F.

2. Tear spinach into bite-size pieces, removing any thick stems. Rinse in a colander, leaving a little water on the leaves. In a large nonstick skillet or Dutch oven, sauté the spinach over medium heat until wilted. Drain in the colander, pushing a little of the extra water out.

3. In a large mixing bowl, combine the cream cheeses with a potato masher. Add sour cream and mash more. Add spinach, mozzarella, artichokes, pepper, garlic, and 2 tablespoons of the parmesan. Stir everything until thoroughly combined.

4. Pour mixture into a 1 1/2 quart baking dish. Sprinkle remaining 1/4 cup of Parmesan on top. Bake 30 minutes, or until parmesan is melted dip is all bubbly. Remove from oven and give it a minute or two to cool down. Serve with baked tortilla chips to applause.

Sunday, March 14, 2010

The Momofuku Milk Bar Compost Cookie

*UPDATED 3/29/10*


The crazy, messy batter. I hate trying to cream butter and sugar without a paddle attachment! BOOO.


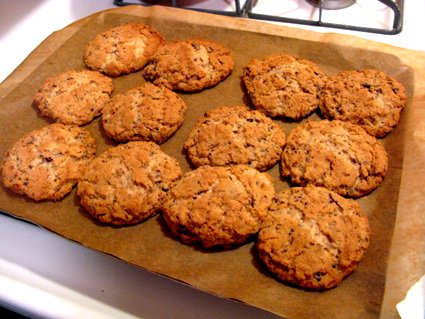
Ugh, my burned cookies before I used the cookie cutters to cut out the unburned centers. Good grief.

*END*
___________________________

Recipe Song: None. I listened to the latest installment of the Sookie Stackhouse mysteries on CD :) Dead and Gone by Charlaine Harris. Pretty good idea, except when I washed dishes or blended things and couldn't hear it anymore. But that's what the rewind button is for, right?

So I was crazy enough to try this recipe. I say crazy because I don't have a stand mixer so I had no paddle attachment to make this. However, I didn't realize that til after I started mixing with my hand mixer and was trying to figure out why it wouldn't mix well and kept spattering all over.

Huh. No wonder they always tell you to recipe through your recipe thoroughly before you attempt it.

Anyways, that combined with an error with the baking temperature, and distractions in the form of a telephone call resulted in not so great cookies. I once again cooked using the convection oven which kinda screwed things up because I entered 400 degrees, and my oven usually converts it to the proper temp for convection oven baking. But for some reason, this time, it stayed at the temp entered and I ended up burning my cookies. I also forgot to check on them part way through because I got caught on the phone and I totally forgot about my cookies. Totally my bad. Needless to say, these didn't turn out at all like the ones pictured. Even after refrigerating the dough for almost 3 hours, they spread so thinly that it turned into one big cookie sheet with dented lines where the spaces between used to be. One sheet was so browned around the edges due to uneven cooking at too high a temperature, that I resorted to using two different sized cookie cutters to cut out the non-burnt centers and tossed the outer edges.

I must say, even tho one entire sheet was burned (even the bottoms), they were miraculously still pretty decent tasting. I was adventurous and used tortilla chip pieces and butterscotch morsels. Interesting combination? I think so! It gave a nice sweet-savory contrasting taste.

I don't know if I'll be making this again because it made a fair mess with only satisfactory results. Maybe I'll try it again when I have a paddle attachment. But until then...no thanks. :) I took pictures of my mishap, but now I'm a tad embarrassed to post them. Maybe one day. But until then, the nice poster of the website I took this from posted more than enough detailed pics of all his steps and that'll help you should you decide to make them as well. Happy baking!

3.5 out of 5 stars (but I would say that's due to my many errors...kitchen adventures indeed.)

__________________________________________

Below from here.

The Momofuku Milk Bar Compost Cookie
recipe by Christina Tosi
(Courtesy of Regis & Kelly's website)

Ingredients:

1 cup butter (that's two sticks, unsalted)
1 cup granulated sugar
3/4 cup light brown sugar
1 Tbsp corn syrup [Note: I left this out; not because I'm against corn syrup, I just didn't have it. The cookies came out fine, though may have had a nicer sheen with the syrup.]
1 tsp vanilla extract
2 large eggs
1 3/4 cups all purpose flour
2 tsps baking powder
1 tsp baking soda
2 tsps Kosher salt
1 1/2 cups your favorite baking ingredients (options: chocolate chips, Raisenettes, Rollos, Cocoa Krispies)
1 1/2 cups your favorite snack foods (chips, pretzels, etc.)

Note: as said above, I used chopped up bittersweet chocolate and crushed pretzels. Next time I'd definitely add potato chips.

1. In a stand mixer with the paddle attachment, cream butter, sugars and corn syrup on medium high for two to three minutes until fluffy and pale yellow in color. Scrape down the sides with a spatula.

2. On a lower speed, add eggs and vanilla to incorporate.

Increase mixing speed to medium-high and start a timer for 10 minutes. During this time the sugar granules will fully dissolve, the mixture will become an almost pale white color and your creamed mixture will double in size.

3. When time is up, on a lower speed, add the flour, baking powder, baking soda and salt.

Mix 45 - 60 seconds just until your dough comes together and all remnants of dry ingredients have incorporated. Do not walk away from your mixer during this time or you will risk over mixing the dough. Scrape down the sides of the mixing bowl with a spatula.

4. On the same low speed, add in the hodgepodge of your favorite baking ingredients and mix for 30 - 45 seconds until they evenly mix into the dough. Add in your favorite snack foods last, paddling again on low speed until they are just incorporated.

5. Using a 6 oz. ice cream scoop (I'm not sure how many ounces mine is, but it worked well), portion cookie dough onto a parchment lined sheetpan.

6. Wrap scooped cookie dough tightly with plastic wrap and refrigerate for a minimum of one hour or up to 1 week.

DO NOT BAKE your cookies from room temperature or they will not hold their shape.

7. Heat the oven to 400 F. Take the plastic off your cookies and bake 9 to 11 minutes. While in the oven, the cookies will puff, crackle and spread.

At 9 minutes, the cookies should be browned on the edges and just beginning to brown towards the center. Leave the cookies in the oven for the additional minutes if these colors don't match up and your cookies still seem pale and doughy on the surface.

8. Cool the cookies completely on the sheet pan (good luck!) before transferring to a plate or an airtight container or tin for storage. At room temp, they'll keep five days.

compostcookies2

Wednesday, March 10, 2010

Cooking Tip #4 - Vanilla Sugar--what the...?

I stumbled upon a recipe for sesame seed cookies the other day and was curious as to what vanilla sugar was and how to substitute it. Just wanted to share it with ya. But really, who has five hours to wait for it to dry when I want to bake now...?

___________________________

Taken from WikiAnswers.com

To make Vanilla Sugar without having to use Vanilla Beans (Which are rare and expensive in Grocery Stores) just use Vanilla Extract and Sugar in a ratio of one teaspoon of Vanilla Extract to every two cups of regular granulated sugar. Then spread the well mixed vanilla sugar on a baking pan lined with wax paper to dry.

*Note* To make Vanilla Sugar with a Vanilla Bean, just crush a Vanilla Bean and mix with Sugar. Then store until needed. When needed, sift out all large bits of ean, until just sugar is left. Store bean with sugar until bean looses flavor.

Wednesday, March 3, 2010

Lemon Poppy Seed Pound Cake

Recipe Song: "Come Together" - Beatles

You're probably thinking, what is this recipe song stuff? Well, I've decided to document what I'm listening to while I bake, this being the first recipe I do it. :) It helps create the mood, I suppose. (This particular song reminds me of the general feel of "In Rainbows" CD by Radiohead. I like it. Back to the real reason we're here...)

When I first saw this recipe on Serious Eats, I was sold. One thing I wasn't too fond of was buying the poppy seed. I purchased a small container of 60 grams of poppy seed and that was already $5+. The recipe requires almost a half of that, so that in itself is somewhat on the more expensive side. I won't be making this often because of that reason, but nevertheless it's interesting to try.

So then: I don't have pastry flour, but using the lovely tip included on Serious Eats as well as on this blog the post before this one, I just used cornstarch + regular whole wheat unbleached flour instead. I'm lazy so no sifting for me. I also used 1/2c applesauce + 1/2c butter to cut down on that fat. Substituting whole parts butter for apple sauce is kinda sketchy, so subbing about half is usually safe. (At least that seems to be my experience.) As I only have a 9"x5" loaf pan, I used that and it made the whole thing bigger and flatter, obviously. I've also gotten into the habit of using my convection oven because it heats things more evenly while using less energy. With my convection oven and the bigger pan, it took about 50 minutes to bake with a nice golden brown top and a beautiful crack in the middle that loaves of bread get. One thing I noticed is that the syrup used at the end is too much, I think we can safely cut the overall amount by about half and be good. I wish I had a saucepan that small. The recipe below suggests giving a good 24 hours before serving, but my loaf is for tonight and I will update after about how it tastes. It smelled absolutely delicious when it was baking though, and if that's any indication of what it'll taste like, I'm sold!

****

Okay, this loaf turned out really delicious. Just needed to bake it for a shorter amount of time, maybe 45 minutes would have been better. It came out a little too hard and a little on the drier side. I think that could also be because I omitted some butter and used apple sauce instead. I could definitely taste the syrup, which was good and addictive.

4.5 out of 5 stars

_______________________


Below from here:

Lemon Poppy Seed Pound Cake

20100228lemonpoppyseedcake.jpg

-makes 1 standard or 3 mini loaves-
Adapted from The Cake Bible

Ingredients

3 tablespoons milk, room temperature
3 large eggs, room temperature
1 1/2 teaspoons vanilla
1 1/2 cups (5 1/4 ounces) sifted cake flour
1 cup plus 2 tablespoons sugar, divided
3/4 teaspoon baking powder
1/4 teaspoon salt
1 tablespoon (6 grams) loosely packed grated lemon zest
3 tablespoons (28 grams) poppy seeds
13 tablespoons unsalted butter, softened
1/4 cup freshly squeezed lemon juice (I got this out of 2 lemons easily)

Procedure

1. Preheat the oven to 350°. Grease your pan(s), line bottom(s) with parchment paper, grease parchment, and flour pan interior. In a small mixing bowl, lightly combine the milk, eggs, and vanilla.

2. In a large mixing bowl, combine the flour, 3/4 cup of the sugar, the baking powder, salt, lemon zest, and poppy seeds. Mix on low speed for 30 seconds to blend. Add the butter and half the egg mixture. Mix on low speed until the dry ingredients are moistened. Increase speed to medium (high if using a hand mixer) and beat for 1 minute.

3. Scrape down sides. Add remaining egg mixture in 2 batches, beating for 20 seconds after each addition. Scrape down sides and scrape batter into prepared pan. Bake until a wooden toothpick inserted in the center comes out clean, 55-65 minutes for an 8 x 4 inch loaf, 30-35 minutes for mini loaves.

4. Shortly before the cake is done, put the lemon juice and the remaining 1/4 cup plus 2 tablespoons sugar in a small pan. Stir over medium heat until the sugar has dissolved. As soon as the cake comes out of the oven, put it on a rack, poke all over with a wire tester or a toothpick, and brush with half of the syrup. Cool in pan for 10 minutes, then invert onto greased wire rack. Poke bottom of cake with tester, brush with some syrup, and set right side up. Brush sides with remaining syrup and allow to cool before wrapping airtight. Store for 24 hours before eating for best results, to give syrup a chance to distribute evenly. (Good luck with that waiting.)

Monday, March 1, 2010

Cooking Tip #3 - Cake Flour Substitute

I don't know about you, but I definitely have neither the room nor inclination to buy cake flour, pastry flour, unbleached flour, wheat flour, whole wheat unbleached flour, whole wheat pastry flour, whole wheat cake flour, etc...that's just too many. So I came across this great tip on Seriouseats.com on a wonderful recipe that I'll be making later this week, hopefully, and I am sharing it with you now. Yay!

1 cup cake flour = 2 tablespoons cornstarch + 7/8 cup all-purpose flour.