Hello Everyone! Thank you for your continued and loyal patronage to my site, I really appreciate all your support and love!
I have decided to stop posting, regularly anyway, on this site. Unfortunately, cooking and baking is getting pretty expensive and without regular employment to fund my culinary explorations, I must go on a hiatus. Besides, I should focus on finding a job anyway, right?
Thank you again! Happy Kitchen Adventures!
Tuesday, June 29, 2010
Friday, June 25, 2010
Smoky Deviled Eggs with Greek Yogurt
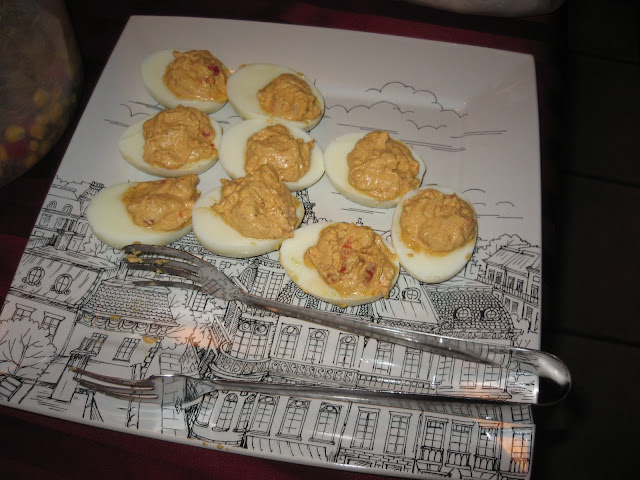
I love Greek Yogurt, so when I saw this recipe on The Kitchn, I knew I had to try it! I have to say, they turned out okay, not the best, but honestly, it's not because of the recipe its because I substituted regular paprika for smoked paprika, which is probably a no-no. I think that caused things to turn out not as well as I had hoped, but that's okay, they were still decent. I love sun dried tomatoes, so I think I added a bit more.
3.5 stars out of 5.
________________________________
Recipe from here.
Smoky Deviled Eggs with Greek Yogurt
makes 12
6 eggs, hard boiled and peeled
1 cup Greek yogurt
2 tablespoons sun-dried tomatoes, finely chopped
1 teaspoon smoked paprika
1 teaspoon salt
1 shallot, thinly sliced
1/4 cup oil
Slice the eggs in half and scoop out the yolks into a bowl. Set the whites aside. Smash the yolks with the back of a fork. Add 1/2 cup Greek yogurt and stir until well combined. Add the remaining yogurt 1 tablespoon at a time until you reach the desired consistency. (I like mine very creamy, so I used the whole cup.)
Mix in the sun-dried tomatoes, smoked paprika and salt.
In a small saucepan, heat oil over medium heat. Test the oil with a slice of shallot – when it instantly sizzles, it's ready. Add the shallot slices to the pan and cook until they turn golden brown. Using a slotted spoon, remove them from the pan and place on a paper towel. While they're still hot, sprinkle lightly with salt.
Using a small spoon, fill each egg white with a generous amount of filling.
If serving immediately, top each one with a frizzled shallot. Or, cover with plastic wrap and refrigerate. Top with shallots right before serving. Best if eaten within a few hours.
Tuesday, June 22, 2010
Double Peanut Butter Chocolate Cookies
Another item I made for the Relay for Life bake sale and forgot to take pictures of, oops! Hehe, oh well! I used to love getting the Eating Well magazine because it had pretty good recipes (they looked good anyway) and it had a lot of interesting facts and tips in it. Of course, part of the allure was that I got it for free at work...oh well. Some of the comments said they omitted the extra canola oil altogether and it turned out great, but I think that would make a more cakey cookie. If you're all for that, hey great, more power to you, but I wanted something with the consistency not synonymous with "low-fat." I think this cookie meets that because it's really not quite low fat. It has a cup of peanut butter in it, but it's all natural peanut butter so you can feel a little bit better about eating these. I followed the instructions and used the chunky peanut butter, but honestly, I didn't really like the taste of the peanuts in it, I liked the crunchiness it afforded, but not the taste of the peanuts. I think it's because I like my peanuts salted and roasted--which, well, that would defeat the healthy part of that, wouldn't it? These turned out pretty decently, but they're definitely not super sweet but they do taste rich. I like the use of the turbinado sugar. Btw, just so you know, the measurement for the turbinado sugar at the end seemed too much to me. I really don't think you need that much. 4 out of 5 stars/Easy to make and I would make them again.
_________________________
Below from here

Makes: 3 dozen cookies
_________________________
Below from here
Makes: 3 dozen cookies
Total Time: 1 1/2 hours
Ingredients
- 1 cup chunky natural peanut butter
- 1/4 cup canola oil
- 1/2 cup packed dark brown sugar
- 1/2 cup granulated sugar
- 2 large eggs
- 3 tablespoons low-fat plain yogurt
- 1 tablespoon vanilla extract
- 3/4 cup all-purpose flour
- 1/3 cup unsweetened cocoa powder
- 1/4 cup rolled oats
- 1 teaspoon baking soda
- 1/2 teaspoon salt
- 1/4 cup semisweet chocolate chips
- 1/4 cup trans-fat-free peanut butter chips, such as Sunspire
- 1/4 cup turbinado sugar (see Note)
Preparation
- Preheat oven to 350°F.
- Beat peanut butter, oil, brown sugar and granulated sugar in a large bowl with an electric mixer on medium speed until the sugars are blended. Beat in eggs, yogurt and vanilla until combined.
- Whisk flour, cocoa, oats, baking soda and salt in a medium bowl. With the mixer on low speed, gradually add the dry ingredients to the peanut butter mixture until blended. (It will be sticky.) Stir in chocolate and peanut butter chips.
- Using a small cookie scoop or slightly rounded tablespoons of dough, place cookies 2 inches apart on ungreased cookie sheets.
- Dip the bottom of a glass in water and then in turbinado sugar. Use the sugared glass to flatten the cookies slightly, leaving a thin layer of sugar on top, rewetting the glass as needed.
- Bake the cookies in batches until they are just set and the tops appear cracked, 8 to 10 minutes. (Do not overbake or they will be dry.) Cool on the baking sheet for 2 minutes before transferring to a wire rack to cool.
Tips & Notes
- Make Ahead Tip: Store in an airtight container for up to 3 days or freeze for up to 3 months.
- Ingredient Note: Turbinado sugar is steam-cleaned raw cane sugar. It’s coarse-grained and light brown in color, with a slight molasses flavor. Find it in the natural-foods section of large supermarkets or at natural-foods stores.
Nutrition
Per cookie: 115 calories; 6 g fat (1 g sat, 1 g mono); 12 mg cholesterol; 13 g carbohydrates; 3 g protein; 1 g fiber; 102 mg sodium; 33 mg potassium.
Friday, June 18, 2010
Chewy Coconut Cookies
So sorry, I totally forgot to take pictures of these! They really weren't good looking though because my baking soda needs to be changed (aka these cookies came REALLY flat and spread like crazy--but it's such a pain because I have so much baking soda left in that stupid box it seems like such a waste to buy anymore. And switch it every month, no less.) I even tried refrigerating them as well, but with no luck. Regardless of how they looked, they were really quite good and chewy as described. I called my paper thin cookies Lace cookies, lol, and tried to make up for its flatness. Oh well! I made these for the my Relay for Life team as a fundraiser so hopefully things will go well and the appearance won't be too off-putting. Originally, I was going to not toast the coconut (i was getting lazy from all the baking I was doing that day) but honestly, what a big difference it made to toast it. Since the recipe didn't specify, I just used the sugary kind of coconut flakes, but I'm sure the natural, unsweetened kind would work as well. Besides the taste, the smell of toasted coconut wafting through the kitchen is reward enough to do it! In case you don't know how, please scroll down for quick toasting instructions, it's super easy and like I said, completely worth it. I love these as a great substitute for chocolate desserts. Blasphemous as it may sound, not everyone is a chocoholic like me, and tragically, some people are quite allergic to it as well. They are quite oily, however. They're definitely not diet food. Maybe adding more flour or using less butter would help with that, but it's so hard to tell with adjustments in baking since everything is so precise. Hope you enjoy these as much as I do! 4.5 out of 5 stars/the flatness and oiliness were turn offs, but other than that, GREAT! _________________________ Toasted Coconut Instructions: Using a baking sheet (the flat one with edges on all sides) covered with aluminum foil, spread a thin layer of coconut flakes evenly over the pan and toast for 350F degrees for 7-10 minutes until the desired level of golden brown is reached. Let cool before using.
_________________________
Below from here.
Yields around 2 dozen cookies.
Prep Time: 30 Min
Cook Time: 10 Min
Ready In: 50 Min
Ingredients
_________________________
Below from here.
Yields around 2 dozen cookies.
Prep Time: 30 Min
Cook Time: 10 Min
Ready In: 50 Min
Ingredients
- 1 1/4 cups all-purpose flour
- 1/2 teaspoon baking soda
- 1/4 teaspoon salt
- 1/2 cup butter
- 1/2 cup packed brown sugar
- 1/2 cup white sugar
- 1 egg
- 1/2 teaspoon vanilla extract
- 1 1/3 cups flaked coconut
Directions
- Preheat oven to 350 degrees F (175 degrees C.) Combine the flour, baking soda, and salt; set aside.
- In a medium bowl, cream the butter, brown sugar, and white sugar until smooth. Beat in the egg and vanilla until light and fluffy. Gradually blend in the flour mixture, then mix in the coconut. Drop dough by teaspoonfuls onto an ungreased cookie sheet. Cookies should be about 3 inches apart.
- Bake for 8 to 10 minutes in the preheated oven, or until lightly toasted. Cool on wire racks.
Tuesday, June 15, 2010
Easy Cream Cheese Brownies
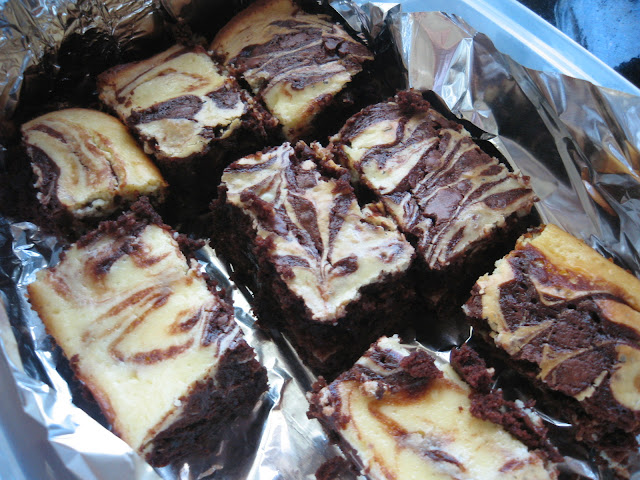
What's better than cream cheese and chocolate? Not much. Except meat.
But no, there's no meat in this. These yummy delicious, wonderful things are absolutely delicious! So easy to make since the recipe calls for a boxed brownie mix of your choice (I always go with Ghiradelli mixes because they are always quite YUMMY.) The bake time below really depends on your brownie mix. I had to bake mine closer to an hour because the Ghiradelli mix calls for 50 or 55 minutes, I forget right now. It's difficult to tell when it's done, I used the toothpick test. Either way, this was so good warm with a scoop of vanilla bean ice cream. Happy baking!
4.5 stars out of 5.
___________________________
Adapted from recipe from here.
SERVES 16
Ingredients
1 package fudge brownie mix1 (8 ounce) package cream cheese
1/3 cup sugar
1 egg
1/2 teaspoon vanilla
Directions
- Preheat oven to 350 F degrees.
- Prepare the brownie mix according to package directions.
- Pour into a greased 13x9-inch baking pan.
- Beat cream cheese with electric mixer on medium speed until smooth.
- Add sugar and mix. Add vanilla and egg; mix until well-blended.
- Place cheese mixture in dolups over the whole pan, leaving some brownie showing inbetween.
- Cut or swirl through batter several times with a knife or fork for a marbled effect. It can be tricky to get a good marble effect so be careful not to over work it.
- Bake for 35 to 40 minutes. Cool; cut into squares. (These will also freeze well).
Friday, June 11, 2010

Wednesday, June 9, 2010
More on Eggs...
8 EGG-cellent uses for Egg shells from Re-nest.com--c'mon, you know you liked that!
Either way, some really interesting tips and uses that I would never have thought possible. Enjoy!
Either way, some really interesting tips and uses that I would never have thought possible. Enjoy!
Tuesday, June 8, 2010
Chicken Enchiladas

Hm. As you can see, I forgot to take a picture of this until someone reminded me near the end. This deliciousness was gobbled up pretty quickly by one of my small groups a few weeks back.
So. Let's get down to business. As you can see, because I stuffed as many enchiladas as I could into this picture, it turned more into a casserole than individual enchiladas, but it was still quite good tasting. I doubled the recipe for us and used two cans of cream of mushroom and simplified things for myself by buying one of those lovely lemon pepper rotisserie chickens from the grocery store. The chicken tasted great...almost like I cooked it myself. LoL. Oh man, yea right. Maybe after a few years, meat is a whole new level of cooking I'm not ready for. Oddly enough, I also misread the recipe and bought corn tortillas too, instead of flour. They worked just fine so long as you heat up a frying pan with no oil or butter or anything, and just heated up the tortillas prior to filling and folding them over so they didn't crack. I also used nonfat milk and everything turned out great so there's some wiggle room for that part. Happy enchilada-ing!
4.5 out of 5 stars!
__________________________________
Recipe from here.
Prep Time: 15 Min / Cook Time: 30 Min /Ready In: 45 Min
Ingredients
- 1 tablespoon butter
- 1/2 cup chopped green onions
- 1/2 teaspoon garlic powder
- 1 (4 ounce) can diced green chiles
- 1 (10.75 ounce) can condensed cream of mushroom soup
- 1/2 cup sour cream
- 1 1/2 cups cubed cooked chicken breast meat
- 1 cup shredded Cheddar cheese, divided
- 6 (12 inch) flour tortillas
- 1/4 cup milk
Directions
- Preheat oven to 350 degrees F (175 degrees C). Lightly grease a large baking dish.
- In a medium saucepan over medium heat, melt the butter and saute the green onion until tender (about 3 to 4 minutes). Add the garlic powder, then stir in the green chiles, cream of mushroom soup and sour cream. Mix well. Reserve 3/4 of this sauce and set aside. To the remaining 1/4 of the sauce in the saucepan, add the chicken and 1/2 cup of shredded Cheddar cheese. Stir together.
- Fill each flour tortilla with the chicken mixture and roll up. Place seam side down in the prepared baking dish.
- In a small bowl combine the reserved 3/4 of the sauce with the milk. Spoon this mixture over the rolled tortillas and top with the remaining 1/2 cup of shredded Cheddar cheese. Bake in the preheated oven for 30 to 35 minutes, or until cheese is bubbly.
Friday, June 4, 2010

Monday, May 31, 2010
Bacon Wrapped Dates
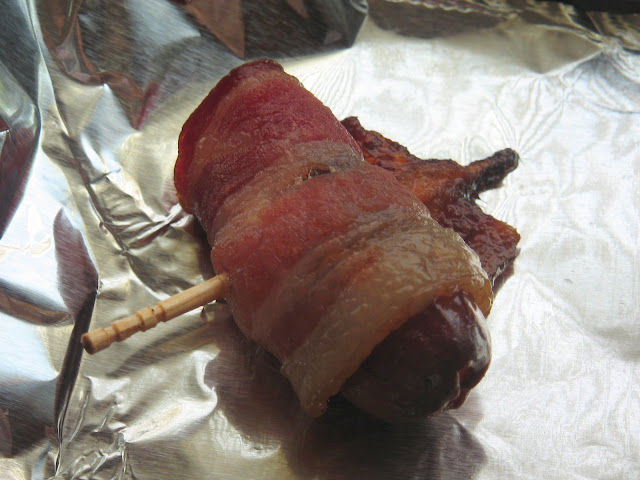
HAPPY MEMORIAL DAY, EVERYONE! Let's take a moment to appreciate all those awesome people who've risked their lives for us. And what better way to celebrate their sacrifices then by eating bacon! Wait--is that right?
Oh yes, you read that right. I love these things, customizable to appease just about any picky palate (save the vegetarian/vegan). So easy, so delicious, so quick to make. Who wouldn't love them?! The only thing I would say to the recipe below is the cook time is off. That really depends on what your bacon needs, how thick it is, etc. I would say eye it and decide for yourself. If you're reading this post and remotely interested in making this recipe, most likely, you've eaten enough bacon in your life that you can discern between raw and cooked bacon.
*Please note: the recipe below uses blue cheese as the stuffing, I just left that all out. :D
4.5 out of 5 stars. I took off 0.5 stars because let's face it, it ain't healthy at all.
Extra tips:
-Try using pineapple or another hard fruit for the center.
-For a creamy twist, try stuffing the dates with soft cheese such as cream cheese or feta (just like the recipe below)
_________________________________________
Recipe found here.
Ingredients
- 1 pound sliced bacon, cut in half
- 1 pound pitted dates
- 4 ounces blue cheese
Directions
- Preheat the oven to 375 degrees F (190 degrees C).
- Slice dates in half, and open them up. Pinch off pieces of blue cheese, and place them into the center of the dates. Close the halves of the dates, and wrap a half-slice of bacon around the outside. Secure each one with a toothpick. Arrange in a baking dish or on a baking sheet with sides to catch any grease.
- Bake for 30 to 40 minutes in the preheated oven, or until the bacon is crisp. Turn dates over after the first 20 minutes for even cooking.
Wednesday, May 26, 2010
Glazed Lemon Cookies (from Gale Gland)
Today was a bad day. Why was it a bad day? I'll tell you why. I made these and they turned out TERRIBLY. You remember my crappy Momofuku kitchen sink cookies? These were much worse. It wasn't that they tasted bad, or were burned beyond belief. I have no idea what happened. Well, that's wrong. I know I put in too much butter, but I got lazy. So, yes, I added too much butter, but then that doesn't explain why some cookies (a very few) baked out okay, and why some died like a puddle of mud...brown puddle of mud. SIGH.
To add insult to injury, I used up the last of my powdered sugar on the glaze and then had to throw away half the glaze, if not more, because I threw away half of my cookies if not more cuz they were CRAPPY.
I ain't gonna take pictures of my crap, so no pictures for you today. sorry.
So yes, if you were wondering--it's true. You really need to follow directions and measurements in baking because it is a science, boys and girls. Don't try to be ridiculous like me and go all lone soldier.
If you make these right, they taste quite good: 4.5/5 stars. They have a shortbread type consistency.
I think...
_________________________________
Glazed Lemon Cookies
3/4 c unsalted butter @ room temp.
1 c sugar
2 tbsp grated lemon zest
2 tbsp lemon juice
2 c + 2 tbsp all-purpose flour
3/4 tsp baking powder
1/4 tsp salt
preheat convection oven to 325 (conventional to 350) and line 2 baking sheets with parchment paper
in mixer w/ paddle attachment or electric hand mixer (its much easier with these) beat butter and sugar on low speed till smooth (don't incorporate air...just blend)
add lemon zest and juice, continue to mix on low until incorporated
add flour, baking powder, and salt, mix on low for 1-2 minutes
check the dough by squeezing some in your hands - it should be crumbly but still form a ball; do not overbeat
scoop dough onto baking sheets with a 1 tsp measuring spoon (mounded spoonful)...they should look like little balls of dough, but don't pat the dough into shape with your hands because they'll look unnaturally smooth after baking
bake until edges turn a light golden brown (~8 minutes) ...don't overbake and dry out cookies by letting them go golden brown all over
transfer cookies to rack and let cool, then glaze (optional)
glaze: 3 tbsp lemon juice + 2 c confectioners' sugar (blend until smooth)
dip tops of cookies into glaze and let cool/dry
i like to fill a pastry bag (or ziploc with corner cut off) with the glaze and drizzle glaze over cookies instead of dipping
Tuesday, May 25, 2010
Baking Tips from The Kitchn
Here a few interesting things to read to help you have your own adventures in the kitchen. Enjoy!
http://www.thekitchn.com/thekitchn/tips-techniques/10-bits-of-baking-knowledge-and-knowhow-morning-roundup-117804
http://www.thekitchn.com/thekitchn/tips-techniques/10-bits-of-baking-knowledge-and-knowhow-morning-roundup-117804
Monday, May 17, 2010
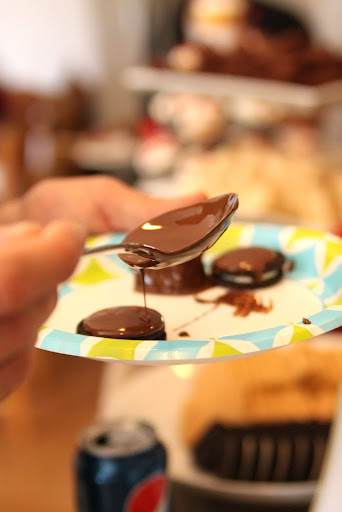
Creamy Lemon Crumb Squares

This picture doesn't do these things justice. They looked and tasted a lot better than this, honest. That might explain why I once again included the original picture from Pioneer Woman (I love href="http://thepioneerwoman.com/">Ree).
Onto the good stuff--I made these because for some reason when I read this, I thought I read that they were going to turn out more like lemon bars. Yea, not so much. Their title is really what they are. They're really easy to make, but honestly, the fact that a whole can of condensed milk goes into this rather scares me. That added with the butter and sugar--well, no one said the Pioneer Woman made low fat or healthy stuff. It still tasted good after all was said and done, but I had a few hang ups about it. I feel bad saying anything negative about PW but this is a blog about adventures and the good, the bad, and the ugly. The good--the crumb was really quite good, more crumb with less creamy lemon would have worked for me. The bad--when it says crumb squares, its more like really crumbly squares which is what they were. You definitely need to serve these chilled so that they solidify with the topping more, but even then, its quite a mess. Completely unrelated, for some reason, I kept tasting a weird diet taste after I ate it, I can't explain it. If you've ever had diet soda, its that same weird lingering aftertaste with these.
The ugly? The mess you get from the crumbles getting all over the place.
Sidenote: When using an entire can of something liquid, it really is a better idea to just open the can rather than putting holes in it and watching the thick liquid very gradually ooze out as years of your life pass away, hair turns grey, dust starts to settle...and we're back.
3.5 stars out of 5. Sorry, Ree!! Good, but had weird diet taste and really bad for you.
___________________________________
Below from here.

- Prep Time 15 Minutes
- Cook Time 25 Minutes
- Difficulty Easy
- Serving Size 12
- 1-⅓ cup All-purpose Flour
- ½ teaspoons Salt
- 1 teaspoon Baking Powder
- 1 stick (1/2 Cup) Butter, Slightly Softened
- 1 cup Brown Sugar (lightly Packed)
- 1 cup Oats
- 1 can (14 Ounce) Sweetened Condensed Milk
- ½ cups Lemon Juice
- Zest Of 1 Lemon
Preparation Instructions
PREHEAT OVEN TO 350 DEGREES.
Mix butter and brown sugar until well combined.
Sift together flour, salt, and baking powder.
Add oats and flour to butter/sugar mixture and mix to combine.
Press half of crumb mixture into the bottom of an 8 x 11 inch pan.
Mix together condensed milk, lemon juice, and lemon zest. Spread onto the bottom layer of the crumb mixture. Top with the other half of the crumb mixture, but don’t press.
Bake for 20 to 25 minutes, or until golden brown.
Allow pan to sit on counter for 30 minutes after baking. Cut into squares and refrigerate for a couple of hours or until cool.
Serve cool.
Tuesday, May 11, 2010
Homemade Cream Cheese Frosting

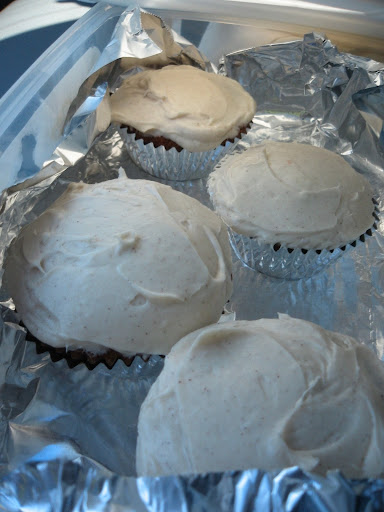
For a recent 30th birthday bash for a friend, I helped frost cupcakes into baseballs as this friend is an avid *ahem* Angels fan. I don't remember how many cupcakes there were, but two cans of store bought frosting wasn't enough to cover all of them and disgustingly enough, we discovered that the third can was actually already opened by someone at the store. They had decided to take a finger of frosting for themselves prior to putting the can back. GROSS.
We decided to make our own frosting to finish off icing the white part and then we needed additional frosting for the red stitching of the baseballs. Little did we realize that this little adventure, which should really have not taken that long turned into almost an hour long project.
The original recipe is below, but it should be noted that we halved it since we didn't need that much, and we added an additional 1/2 stick of butter when the frosting was so thick it was a lumpy ball that couldn't be used in a piping bag (or the ghetto version: a ziploc bag). I had the priveledge and joy of using my friend's beautiful KitchenAid mixer. (*pause for moment in heaven*) When day, when I get married...well, rest assured it's gonna be on the registry.
Back to the topic at hand. The original mistake I made with this recipe was that I used the whisk attachment when creaming together the cream cheese and the butter instead of using the paddle attachment as it usually tells you to do in recipes. It was a terrible mistake because it wouldn't even beat properly and all the butter got stuck whisk blades (is that the proper term, I don't know) and I had to spend a lot of time with a spatula and a butter knife trying to push out pieces of butter and cream cheese from between the whisk blades. After this, I proceeded to mix it BY HAND because there was no way I was going to use the whisk again. Not my idea of fun.
My mind was also not in the right place and I just poured in the vanilla in the beginning rather than waiting while I poured in the powdered sugar. Thanks, my friends, for putting up with my confusion. Weird, I tell ya, weird.
After all was said and done, and the extra butter added (you could probably also decrease the powdered sugar amount or cream cheese amount to get a thinner frosting), I scooped the frosting into a ziploc bag opened over a cup and squeezed the frosting into the bottom corner of the bag. If you've never made a makeshift piping bag for frosting, always remember--snip the hole for the frosting smaller than you think you'll need. Sounds simple enough, but it isn't always the first thought, and you really only need a small hole to frost. You can always cut a bigger hole if you need to, but you definitely can't cut a smaller hole...and if you can, well, please talk to me after the show, thanks!
Oh! Sidenote-dying the frosting red was an interesting time. I used more than a bottle of red frosting to make it this bright red color, and after that I proceeded by adding more in hopes of getting a darker, fuller red---yea, no dice. I even tried adding a TAD of blue to just get it darker, nope. It tried to turn purple on me instead, so I had to add more red to make it red again. I felt like a mixologist. I've never worked with food coloring before so I don't know how it works. But I will say, if you work with fondant, I think the chemistry of that is a little more sensitive.
Moving on, I had fun making these, sans the (i will admit they're cute) Angels tags that luckily I did not have to attach. My friend's very crafty wife made them and really, they are quite cute, even if they do advertise for that other Los Angeles team. (But we who really live in So Cal know that Anaheim isn't even in LA, but hey, who's counting?)
Anyway, the frosting is quite yummy if you love cream cheese frosting, but I docked points for its annoyingly thick texture for which we were not prepared. These are some of the pics I took from the party with my SLR. *sigh* SLR pictures are so much prettier than my point-in-shoot pictures, why don't I use my SLR more?? Enjoy!
4.5 stars out of 5! Wonderful and I'll definitely make it again!

This was my first time piping anything. Couldn't tell, could ya?? I'm sure the squiggly, uneven lines and the runny parts weren't clues.
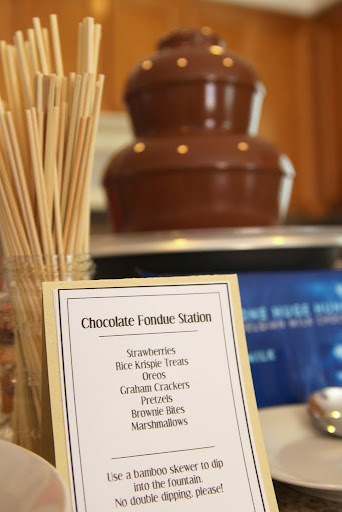
I love these people because they know how to throw a party. What do you mean, you ask? I mean this---CHOCOLATE FONDUE FOUNTAIN, YES!!!!!!
Warning, gratuitous usage of chocolate follows...

And last but not least: nothing says Happy Birthday like a Birthday steak. Yes, you read that correctly.

Go Meat! Happy Birthday, Junior!
___________________________________________
Recipe from here.
This recipe makes 3 cups of frosting. Plenty enough for any regular cake.
Ingredients
- 2 (8 ounce) packages cream cheese, softened
- 1/2 cup butter, softened
- 2 cups sifted confectioners' sugar
- 1 teaspoon vanilla extract
Directions
- In a medium bowl, cream together the cream cheese and butter until creamy. Mix in the vanilla, then gradually stir in the confectioners' sugar. Store in the refrigerator after use.
Saturday, May 8, 2010
Super-Soft Snickerdoodles
I was so disappointed with this recipe I didn't even bother taking pictures of my cookies. I think this "adventure" failed on several points. First of all, I tried to be sneaky in a sense and tried to substitute a third of the flour with whole wheat flour. But the thing is, whole wheat flour is just different, it usually requires more liquids and well, these cookies came out dry. I think I should have fully melted my butter rather than mostly melted it. It made a lumpier batter rather than a smooth batter. Then there's the matter of where I tried to use my convection oven again, and if you'll notice, this recipe only takes 7 minutes to bake. 7! So, needless to say, I didn't know when they would be done with my convection oven because using that makes everything go faster. Annoyingly so, my cookies on two separate racks cooked unevenly, regardless of the fact that I used my convection oven and so I burned the ones on the bottom rack while the top were just slightly overdone. They came out not very sweet (don't ask me how the whole wheat flour, use of convection oven, and other such factors contributed to that one cuz im stumped), really soft (i realized AFTER i made these that i like my snickerdoodles crispy, good timing I know), and just overall not good. I didn't even bother serving them to my small group for whom I made them because I was like ugh. Instead, I sent them off with my mom to my mom's work where they will basically devour almost anything and got a call from my mom the next day about how she and her coworkers loved it because it wasn't so sweet and it went great with her coffee.
Go figure.
Needless to say, I was NOT impressed with this recipe and will NOT be making it again. And then, you gotta think...whoever heard of a snickerdoodle recipe with no cream of tartar? Bleh.
No picture, no good!
2.5 out of 5 stars. No thank you, and never again.
_______________________________
Recipe from here.
Super Soft Snickerdoodle Cookies
makes about 3 dozen cookies
1 cup (2 sticks) unsalted butter
1/2 cup dark brown sugar
1 cup white sugar
3 cups flour
1/4 teaspoon cinnamon
1/4 teaspoon nutmeg
1 teaspoon baking soda
1/2 teaspoon salt
3 eggs
1 teaspon vanilla extract
For the cinnamon sugar:
1/4 cup white sugar
1 tablespoon cinnamon
1/4 teaspoon nutmeg
Heat the oven to 425°F. Gently melt the butter in a saucepan or in the microwave and let it cool while you mix the dry ingredients. Stir together the sugars, flour, spices, baking soda, and salt. Whisk the eggs into the cooled butter and add the vanilla. Stir the wet ingredients into the dry ingredients, stirring just until it comes together.
In a soup plate or shallow bowl, mix together the white sugar, cinnamon, and nutmeg. Form small 1 1/2-inch balls of dough and roll them in the cinnamon sugar. Place them on an unlined, ungreased baking sheet and flatten slightly. Bake for 7 minutes then remove and let cool on the baking sheet for 5 minutes. Remove to a wire rack.
The dough can be refrigerated for up to 5 days, well-wrapped. It can also be frozen in logs.
Wednesday, April 28, 2010
Ice Cream Brownie Cake

Happy VERY belated birthday, Elyse! Haha, oh man. So I wish I had the opportunity to take a picture of the inside of the cake, however I was the cake cutter at the party and felt it was a little too--weird-- if I stopped everything to do that. So this is what you get. :)
Yes, I know, it's SUPERBLY uneven, the frosting is terrible, the writing is crooked, but man oh man, was it good. I bought a Ghiradelli's Dark Chocolate brownie mix from the store as well as some frosting and went at it.
I say this is a budget dessert because this in comparison to buying an actual ice cream cake---well, those can run you $30-40 depending on where you get it and it wouldn't be this large. I was lucky enough to get my ice cream (Breyer's Vanilla) on sale for $2.88 per container. Can I just take a moment to say how things keep shrinking in size?? It used to be a half gallon container, now its a slim 1.2 L container selling for an original price of almost $5! Are they joking? Too bad the brownie mix wasn't on sale, but $3 for a bit of heaven without making my own brownies from scratch on the same day that I was making lemon bars--well, I'm willing to deal. Since I'm seriously unemployed, cheaper (for the most part because I can't say the same thing for cheap napkins from Target) is better. This was my birthday present to Elyse--a homemade ice cream brownie cake.
Recipe:
1 prepackaged cake or brownie mix
3 quarts of ice cream
1 13 x 9 x 2in baking dish
1 can of frosting
1/4c sprinkles
Foil or parchment paper
1. Line your baking dish with foil or parchment paper for ice cream. Scoop softened ice cream onto lined baking dish and try to smooth or even out as best as you can. Making it even is always the hard part. After you've made a layer a little under 1" high freeze baking dish with ice cream covered with foil until hardened.
2. After a few hours, remove ice cream from baking dish. This should be easy because of your foil underneath. Replace ice cream in freezer. I used a larger baking dish and put the ice cream in it with the foil on it still.
3. Prepare brownie mix and bake as directed in the same baking dish you originally used for the ice cream. It will be a thinner layer of brownie than the directions call for, so keep an eye on it to cook faster and not burn. Luckily because you'll be freezing it later, if your brownie comes out a little more done or underdone than normal, it will be fine because it firms up.
4. After your brownie is done baking, cool it down to still a little warm and place layer of ice cream on top. This way, hopefully your ice cream will melt just a little into the brownie to help the brownie and ice cream stick together when you cut it. (I had a little bit of a problem with this.)
5. Top ice cream layer with frosting, filling in any cracks. Of course if you had ice cream cracks, you can always add in more ice cream.
6. Sprinkles, flowers, etc. As you can see, I had some leftover beautiful baby blue sprinkles from my sister's baby shower and proceeded to carefully draw out Elyse on the top, cuz I wasn't crazy enough to write out Happy Birthday.
There are other ways to do this too. You could always take a page from Baskin Robbins and use a wire or string and after removing the carton from the ice cream, proceed to cut the ice cream in horizontal slices and place them on top. This didn't work well with the size of my dish so I ditched this option.
Obviously all of these things can be tweaked to your own specifications. I used the Dark chocolate brownie mix, but feel free to use a vanilla cake, a funfetti cake, a lemon cake, etc. The possibilities are endless. Same goes for the ice cream, maybe try a sorbetto instead which could be light and fun. You could also use a cream cheese frosting or a funfetti frosting. (Can you tell I like the funfetti? It's so pretty.) You could also get crazy and use a sheet cake and cut that in half horizontally and then have a layer of cake followed by a layer of ice cream followed by a layer of cake again and then frosting. That looks so much prettier than my ugly second cousin cake. :)
Needless to say, it was an absolute hit. The dark chocolate brownie complimented so well with just plain ol' vanilla ice cream by balancing out the sweetness. It was very well received and most of it was gone. Just have fun and enjoy!
5 of 5 stars! YUMMY.
Monday, April 26, 2010
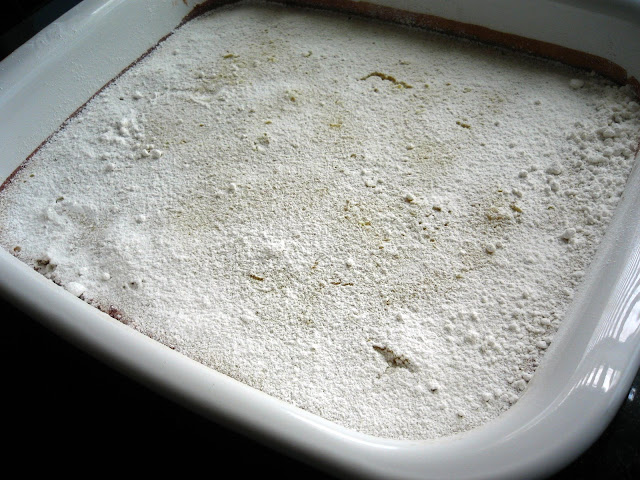
Lemon Bars
I don't know about you, but I love lemon bars. However, they always seemed so difficult to make. These ones were actually easy. The only thing I found difficult was making sure the filling was done and set because none of the recipes I looked at really described when that or the crust was done. I just did it off time and kinda jiggling it to see if it was set or not. I like the look of the lemon zest in the first picture, tho you don't see it anymore after you douse it with powdered sugar. Yay, sugar!
I gotta admit, there's a LOT of butter that goes into that crust, I'm going to see if I can't find another recipe with less in it. This is definitely NOT a diet/low cal/low fat recipe.
Overall, it turned out great. I think I prefer my lemon bars a little more on the zesty side and not as sweet as this recipe does turn out pretty sweet. Also, I melted the butter prior to mixing it into the crust and it was too melted so the crust was a little too crumbly. Gotta watch that next time--I knew it was going to happen too! I also mixed the crust by hand, which I think is much better than by mixer. I could really feel the texture and it was nice to just get my hands in there and work the dough. I'm not usually a get my hands dirty kind of person, but it was a nice change.
Boo, I forgot to take a picture of the just baked crust, so you'll have to forgive me for that, but here everything is after I just took it out of the oven before I put on the powdered sugar. I waited a bit before I dusted it. Can you see the browned edges on the sides of the baking pan? This is what happens when you're not careful moving the whole thing to the oven. Because the filling mixture is so watery, it moved around a lot and that's what happened. Good thing I planned on cutting it up and serving it in another pan.
So you'll notice that mostly the lemon bars are covered pretty well and pretty evenly, however there are some interesting places (note the upper right hand corner) where its more like bouldered sugar instead of powdered sugar...lol. Well, let's just say I had a little mishap. So instead of using a sifter or whatever, I used a tea leaf holder. It looks sorta like this:

Filled that with powdered sugar and that took care of most of my lumps. However, a few times I bumped it too hard or whatever and the darn thing opened up and out came a boulder. Regardless, I thought it was a pretty cool idea, just takes a little bit more time cuz the darn thing is so small. Anyway...the finished product turned out wonderfully!
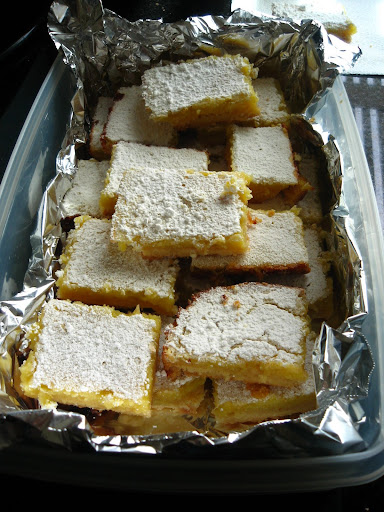
Yummy!!
4.5 stars out of 5!! Delicious and delicate. Wonderful! If you asked my dad, he would have given them like a 6/5. Made me happy!
Extra tip: try using key limes to make key lime bars! What a fun twist.
_____________
Below from here.
I gotta admit, there's a LOT of butter that goes into that crust, I'm going to see if I can't find another recipe with less in it. This is definitely NOT a diet/low cal/low fat recipe.
Overall, it turned out great. I think I prefer my lemon bars a little more on the zesty side and not as sweet as this recipe does turn out pretty sweet. Also, I melted the butter prior to mixing it into the crust and it was too melted so the crust was a little too crumbly. Gotta watch that next time--I knew it was going to happen too! I also mixed the crust by hand, which I think is much better than by mixer. I could really feel the texture and it was nice to just get my hands in there and work the dough. I'm not usually a get my hands dirty kind of person, but it was a nice change.
Boo, I forgot to take a picture of the just baked crust, so you'll have to forgive me for that, but here everything is after I just took it out of the oven before I put on the powdered sugar. I waited a bit before I dusted it. Can you see the browned edges on the sides of the baking pan? This is what happens when you're not careful moving the whole thing to the oven. Because the filling mixture is so watery, it moved around a lot and that's what happened. Good thing I planned on cutting it up and serving it in another pan.
So you'll notice that mostly the lemon bars are covered pretty well and pretty evenly, however there are some interesting places (note the upper right hand corner) where its more like bouldered sugar instead of powdered sugar...lol. Well, let's just say I had a little mishap. So instead of using a sifter or whatever, I used a tea leaf holder. It looks sorta like this:
Filled that with powdered sugar and that took care of most of my lumps. However, a few times I bumped it too hard or whatever and the darn thing opened up and out came a boulder. Regardless, I thought it was a pretty cool idea, just takes a little bit more time cuz the darn thing is so small. Anyway...the finished product turned out wonderfully!
Yummy!!
4.5 stars out of 5!! Delicious and delicate. Wonderful! If you asked my dad, he would have given them like a 6/5. Made me happy!
Extra tip: try using key limes to make key lime bars! What a fun twist.
_____________
Below from here.
- FOR THE CRUST:
- 2 cups Flour, Sifted
- ½ cups Powdered Sugar
- 1 cup Butter, Softened
- _____
- FOR THE FILLING:
- 4 whole Eggs Beaten
- 2 cups White Sugar
- ½ cups Lemon Juice
- 1 Tablespoon Lemon Zest, Grated
- ¼ cups Flour
- ½ teaspoons Baking Powder
Preparation Instructions
For the crust, mix the softened butter into the flour and powdered sugar with your hands (or a pastry blender) until it clings together. Press the mixture into a 13×9″ greased pan. Bake at 350 degrees for 20 – 25 minutes or until lightly golden. For the filling, beat the eggs with a hand mixer for about 5 minutes until frothy. Add the sugar, lemon zest and lemon juice. In another bowl, sift together flour and baking powder. Stir into the egg mixture. Pour over the baked, warm crust. Bake at 350 degrees for 25 minutes. Cool and sprinkle with powdered sugar. Done!
Wednesday, April 21, 2010
Healthy Apple Cobbler

Alright, yet another recipe I made awhile ago...sorry for the delay. I wanted to try this because there's no butter and no sugar and it still turned out really quite good. The recipe below uses berries, but I used apple instead, and it still turned out quite good.
So, I kinda cheated because I took a tbsp of butter, cut it into tiny little pieces and then stuck it all over the topping for baking. This worked well, but was completely unnecessary. Also, one thing that I didn't like so much about this recipe is, the topping wasn't enough for the amount of fruit it asks for and it didn't specify which size pan to use. So I used like an 8" x 8"--gosh, I hope that's right. Here I am criticizing them about not including pan size and I'm too lazy to get up off my butt and go look at the size dimensions of the pan in the kitchen. :) I also doubled the amount of topping cuz let's face it, that's the best part. I used little organic fuji apples and they turned out quite well. I imagine the tartness of granny smith would work well too. Overall, I think this is a great healthy, non-chocolate, budget friendly dessert that's super quick and easy! I was lucky enough to be at Fresh 'n Easy earlier in the day and the bag of organic apples was on clearance because a few were bruised and what not. One man's trash...With the apples, it reminded me a little of apple pie---who doesn't like apple pie??
I served this plain, but it would no doubt be awesome served warm with ice cream. Yummy!! It smells delicious when cooking.
4 out of 5 stars! So many attributes--quick, delicious, cheap, and healthy!
______________________
Recipe below from here.
Ingredients
- 3 cups Mixed Berries Or Any Fruit, Fresh Or Frozen
- ¼ cups Plus 1 Tablespoon Whole Wheat Flour
- ½ cups Honey, Divided
- ½ cups Rolled Oats
- ¼ cups Chopped Walnuts
- 1 teaspoon Cinnamon
- ½ teaspoons Ginger
- ¼ teaspoons Nutmeg
- 1 teaspoon Canola Oil
Preparation Instructions
Preheat oven to 350°F.
Spray an 8″ x 8″ baking pan with cooking spray and set aside. In a large bowl, toss fruit and 1 tablespoon flour together. Add 1/4 cup honey (reserve the remaining 1/4 cup of honey for topping) and use your fingers to thoroughly combine ingredients. If using frozen berries, the honey may cause them to bunch together, so you’ll have to pick them apart by hand. Pour fruit mixture into the baking pan.
In a medium bowl, mix remaining flour, oats, walnuts, cinnamon, ginger and nutmeg until combined. Add remaining honey and canola oil. Use your fingers to thoroughly combine the ingredients. Sprinkle the flour and oat mixture evenly over the fruit.
Bake for 40 to 45 minutes until fruit is bubbly and the topping is browned and crisp. Let cool for 20 minutes. Serve plain or top each serving with vanilla yogurt.
Monday, April 19, 2010
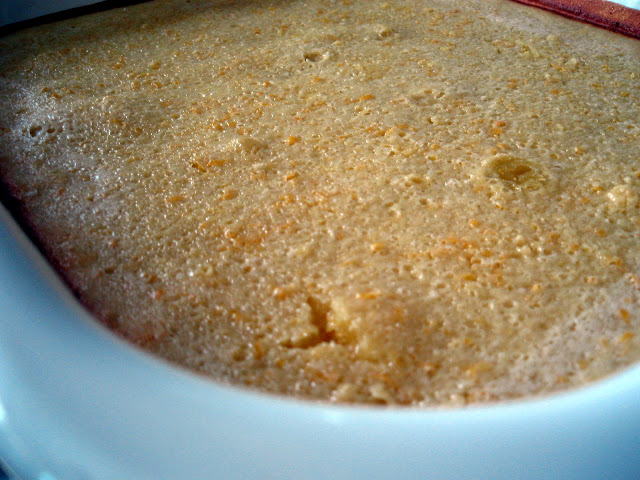
Coffee Cake Loaf
And we're back! Alright, I finally uploaded some pictures from the past few weeks of baking, so get ready. Yes, miracles do happen.
A recipe with, ironically enough, no coffee in the ingredients. :)
This cake loaf was actually made a few weeks ago so of course now I don't remember what the heck I was listening to when I made it. So the funny thing about this recipe is it's really for cupcakes...jumbo cupcakes. But it didn't work out when I made it. I have these blue silicone muffin-y type "tins" (yea, I know, silicon does not equal tin, hence the quotes), and my mix just didn't go well into them and it started rising and getting too full, so I didn't want to continue baking them. Anyway, the point of that really long sentence was to say that I turned it into a coffee cake loaf. The reviews of this recipe, which can be found on the linked page, were correct---the amount of topping you make for these cupcakes is really an absurdly large amount. In fact, I mixed it a great deal of the topping before even putting it on top of the loaf because there was just too much. But you know what? It turned out great that way. I did a bit actually mixed into the dough and a bit folded into the dough. That way, there were some swirl-ish type of things within the loaf when you cut it as well as a nice overall cinnamon flavor. :D
I used light sour cream, but I have a desire to remake this and use low fat greek yogurt instead. It's better for you, or so they say. If you're down for that experiment, I love Fage Yogurt which can be found at your local Trader Joe's or Fresh 'n Easy. I also completely left out the confectioner's sugar for the dusting. It really didn't need it. The mix produced enough dough to fill my jumbo loaf pan, which is saying a lot. It baked for around 50 minutes on the usual baking setting not the convection oven setting. What came out smelled and tasted quite delicious. This could easily be a breakfast on the go type of thing (not particularly healthy, but who's counting?), or an after dinner snack heated up in the microwave with a scoop of vanilla ice cream...oh, I'm salivating already. Oh, right, and a slice with coffee. Enjoy!

Picture of the loaf right after it came out of the oven...oh yes. :)

And another picture after I sliced it up and put it in this nifty plastic container that used to hold Vegetable Pork Buns, lol!! I assure you, I made these, they were not purchased from the local store, despite their suspect container.
4 out of 5 stars!
_______________________
Below from here.

A recipe with, ironically enough, no coffee in the ingredients. :)
This cake loaf was actually made a few weeks ago so of course now I don't remember what the heck I was listening to when I made it. So the funny thing about this recipe is it's really for cupcakes...jumbo cupcakes. But it didn't work out when I made it. I have these blue silicone muffin-y type "tins" (yea, I know, silicon does not equal tin, hence the quotes), and my mix just didn't go well into them and it started rising and getting too full, so I didn't want to continue baking them. Anyway, the point of that really long sentence was to say that I turned it into a coffee cake loaf. The reviews of this recipe, which can be found on the linked page, were correct---the amount of topping you make for these cupcakes is really an absurdly large amount. In fact, I mixed it a great deal of the topping before even putting it on top of the loaf because there was just too much. But you know what? It turned out great that way. I did a bit actually mixed into the dough and a bit folded into the dough. That way, there were some swirl-ish type of things within the loaf when you cut it as well as a nice overall cinnamon flavor. :D
I used light sour cream, but I have a desire to remake this and use low fat greek yogurt instead. It's better for you, or so they say. If you're down for that experiment, I love Fage Yogurt which can be found at your local Trader Joe's or Fresh 'n Easy. I also completely left out the confectioner's sugar for the dusting. It really didn't need it. The mix produced enough dough to fill my jumbo loaf pan, which is saying a lot. It baked for around 50 minutes on the usual baking setting not the convection oven setting. What came out smelled and tasted quite delicious. This could easily be a breakfast on the go type of thing (not particularly healthy, but who's counting?), or an after dinner snack heated up in the microwave with a scoop of vanilla ice cream...oh, I'm salivating already. Oh, right, and a slice with coffee. Enjoy!
Picture of the loaf right after it came out of the oven...oh yes. :)
And another picture after I sliced it up and put it in this nifty plastic container that used to hold Vegetable Pork Buns, lol!! I assure you, I made these, they were not purchased from the local store, despite their suspect container.
4 out of 5 stars!
_______________________
Below from here.
- FOR STREUSEL
- 1 cup packed dark-brown sugar
- 1 cup all-purpose flour (spooned and leveled)
- 1/2 teaspoon ground cinnamon
- 1/2 teaspoon salt
- 1/2 cup (1 stick) cold unsalted butter, cut into small pieces
- FOR MUFFINS
- 1/2 cup (1 stick) unsalted butter, room temperature, plus more for pans
- 1 3/4 cups all-purpose flour (spooned and leveled), plus more for pans
- 2 teaspoons baking powder
- 1 teaspoon baking soda
- 1 cup sour cream
- 1 cup granulated sugar
- 1 teaspoon pure vanilla extract
- 2 large eggs
- confectioners' sugar, for dusting
Directions
- Prepare streusel: In a medium bowl, stir together brown sugar, flour, cinnamon, and salt. With a pastry blender or two knives, cut in butter until mixture resembles large coarse crumbs; refrigerate until ready to use.
- Prepare muffins: Preheat oven to 350 degrees. Butter and flour two jumbo 6-cup muffin pans. In a small bowl, whisk together flour, baking powder, and baking soda; set aside.
- Using an electric mixer, beat together butter, sour cream, granulated sugar, and vanilla on medium speed until light and fluffy. Beat in eggs, one at a time, until well combined. With mixer on low, beat in flour mixture just until combined.
- Divide half the batter among muffin cups; top with half the streusel. Cover with remaining batter; top with remaining streusel. Bake until a toothpick inserted in the center of a muffin comes out clean, 25 to 30 minutes. Cool in pan 5 minutes, then transfer to a rack to cool completely. Dust with confectioners' sugar before serving.
Wednesday, April 14, 2010
Homemade Hummus Recipe
Good grief, I suck at this posting business. It's the pictures of recipes that I want to post that always slow me down. I would love to show you glossy, beautifully posed picture after picture that I've taken, but since I'm too cheap to get a cardreader, it's always an ordeal to upload pictures. So what happens? I upload pictures like once a month and who suffers? You. The nice people who take time out of their busy lives to visit this ridiculous blog. THANK YOU.
So, since we're talking about homemade lovely tahini recipes from the previous post, I thought I would post a homemade hummus recipe straight from one of my favorite foodie websites TheKitchn. (No, I did not take that picture either...sigh). Enjoy and thanks for your patience!!
_______________________
Ingredients
1 15-oz can of chickpeas, drained
1/2 of a fresh lemon, juiced
1 small clove of garlic, minced finely
2 tbsp. olive oil
3 tbsp. tahini. Note: if you don't want to buy premade tahini, here is an easy tutorial on how to make your own tahini.
1/2 teaspoon salt
1/2 teaspoon finely ground black pepper
1 teaspoon sumac
Tools
A food processor or blender
Instructions
1. Combine all ingredients except the sumac.
2. Blend until smooth. If it is a little dry, just add a little more lemon juice or olive oil, a teaspoon at a time, until you have the desired consistency. Add more salt and pepper if you like.
3. Scrape out the hummus in a serving bowl and sprinkle the sumac on top.
4. Serve with raw veggies, or spread on some pita bread.
Other Hummus Variations:
• Try drizzling a little pomegranate molasses on top.
• Add two to three tablespoons of harissa for a little kick.
• Blend in 1 cup of roasted vegetables such as eggplant, zucchini, bell peppers, and garlic for a roasted vegetable hummus.
• For olive hummus, fold in 3/4 cup of chopped green or black olives.
• Nutty hummus is good! Try adding some lightly toasted walnuts or pine nuts.
• For a lemony hummus, add 1/4 cup of chopped preserved lemons.
Sunday, April 11, 2010
Homemade Tahini Sauce
I love the idea of making my own tahini, especially because that leads to hummus! Enjoy the following recipe and try it for yourself! You could always use it to make your own hummus! Yummy!
___________________
Recipe taken from here.
___________________
Recipe taken from here.
Tahini
Ingredients
2 cups sesame seeds
1/2 cup olive oil
Procedure
1. Preheat oven to 350 degrees. Place sesame seeds on a rimmed baking sheet and toast sesame seeds for 5-10 minutes, shaking the seeds frequently with a spatula. Do not allow to brown. Cool for 20 minutes.
2. Pour sesame seed into the bowl of a food processor and add the olive oil. Blend until smooth, about 2 minutes. The tahini should be thick, yet pourable. Add more oil and blend again if it's too thick. Store in an airtight container in the refrigerator for up to a month.
Tuesday, March 30, 2010
Better Beef Lasagna
I am a sucker for great Italian food. If it were up to me, I would eat Italian food every single day. Not necessarily every single meal, but certainly every day. Just imagine---okay, I need to stop because the drooling is affecting the effectiveness of the keyboard keys. Anyway, when we decided to go with an Italian theme, I immediately thought of lasagna because its delicious, wonderful, yummy, scrumptious---oh, crap, drool problem again.
One bad aspect of lasagna, however, is that it's usually loaded with fat and calories because of the beef and sheer excess of cheese used. Another drawback being time. Lasagna is so time consuming to make because there are just so many steps. I felt like this recipe by Elie Krieger, whom I love by the way, appropriately met my biggest concerns.
I made this recipe for a potluck for my small group and was really quite anxious. There's just a tad bit of pressure when you don't normally "cook" (yay baking!), and you're the one in charge of the entree (READ: if you screw up, everyone's screwed). Good times! But everything turned out decently.
Don't be alarmed by the intermediate level difficulty of this recipe, it isn't too bad actually. Or maybe I was just expecting a war and it turned out just fine. It really did take around the time described below to prep and cook. One of the things I don't like the recipe calls for 4 cups of marinara, but when you're in the store...well, I didn't know how much that was and hoped it was around a jar size. In actuality, I ended up running short on sauce and I wonder if that contributed to my lasagna being a little dry. It definitely isn't the dripping, saucy mess that you're used to from lasagna, but this is supposed to be healthier. I bought a nice, organic marinara from Trader Joe's and it tasted beautifully. I was surprised the meat and lasagna tasted pretty well spiced when the recipe doesn't call for extra spices. I did however end up adding a few pinches of dried oregano to the top of the lasagna when I added the last layer of sauce and cheese. It smelled so good when it baked--the drooling started all over again.
All in all, I think this turned out well. I ended up using 95% lean beef because I couldn't find 90% lean and it worked, in fact the beef taste was better for it. I also mixed up portobello and crimini mushrooms because all portobellos was out of my budget range. I think what messed up my version was that I baked it and then stopped to refrigerate it because it was too early. Then I had to rebake it and I think this reheating/double baking dried it out a little bit. It really could have used that extra sauce. I also added more mozzarella and used regular Parmesan instead of Fresh. Yummy! Great recipe, happy eating!

A peek at the lasagna---so ghetto with the foil covering it, ha!
4 stars out of 5 (would have been 4.5 if it wasn't dry)
_________________________
Recipe from here.
Recipe courtesy Ellie Krieger
One bad aspect of lasagna, however, is that it's usually loaded with fat and calories because of the beef and sheer excess of cheese used. Another drawback being time. Lasagna is so time consuming to make because there are just so many steps. I felt like this recipe by Elie Krieger, whom I love by the way, appropriately met my biggest concerns.
I made this recipe for a potluck for my small group and was really quite anxious. There's just a tad bit of pressure when you don't normally "cook" (yay baking!), and you're the one in charge of the entree (READ: if you screw up, everyone's screwed). Good times! But everything turned out decently.
Don't be alarmed by the intermediate level difficulty of this recipe, it isn't too bad actually. Or maybe I was just expecting a war and it turned out just fine. It really did take around the time described below to prep and cook. One of the things I don't like the recipe calls for 4 cups of marinara, but when you're in the store...well, I didn't know how much that was and hoped it was around a jar size. In actuality, I ended up running short on sauce and I wonder if that contributed to my lasagna being a little dry. It definitely isn't the dripping, saucy mess that you're used to from lasagna, but this is supposed to be healthier. I bought a nice, organic marinara from Trader Joe's and it tasted beautifully. I was surprised the meat and lasagna tasted pretty well spiced when the recipe doesn't call for extra spices. I did however end up adding a few pinches of dried oregano to the top of the lasagna when I added the last layer of sauce and cheese. It smelled so good when it baked--the drooling started all over again.
All in all, I think this turned out well. I ended up using 95% lean beef because I couldn't find 90% lean and it worked, in fact the beef taste was better for it. I also mixed up portobello and crimini mushrooms because all portobellos was out of my budget range. I think what messed up my version was that I baked it and then stopped to refrigerate it because it was too early. Then I had to rebake it and I think this reheating/double baking dried it out a little bit. It really could have used that extra sauce. I also added more mozzarella and used regular Parmesan instead of Fresh. Yummy! Great recipe, happy eating!
A peek at the lasagna---so ghetto with the foil covering it, ha!
4 stars out of 5 (would have been 4.5 if it wasn't dry)
_________________________
Recipe from here.
Recipe courtesy Ellie Krieger
- Prep Time:35 min, Cook Time:1 hr 15 min
- Level:Intermediate
- Serves:6 servings
- 12 ounces whole-wheat lasagna noodles (15 noodles)
- 8 ounces lean ground beef (90 percent lean or higher)
- 2 teaspoons olive oil
- 8 ounces portobello mushrooms, diced (about 3 large mushroom caps)
- 4 cups good quality store-bought marinara sauce
- 1 (15 ounce) container part-skim ricotta cheese
- 1 (10 ounce) package frozen chopped spinach, thawed and well drained
- 1 egg, lightly beaten
- 1/2 teaspoon salt
- 1/2 teaspoon freshly ground black pepper
- Pinch ground nutmeg
- 1/4 cup grated Parmesan
- 3 ounces grated part-skim mozzarella cheese (about 2/3 cup)
Directions
Preheat the oven to 375 degrees F.
Cook the noodles al dente according to the directions on the package. Drain them well then lay out on waxed paper to prevent them from sticking to each other.
Heat a large nonstick skillet over a medium-high heat. Add the beef and cook until no longer pink, breaking it up into small pieces as it cooks, about 3 minutes. Transfer the meat to a plate, discarding any fat remaining in the pan.
Add the oil to the same pan and heat over a medium-high heat. Add the mushrooms and cook, stirring occasionally until all the liquid has evaporated and they begin to brown, about 5 minutes. Return the meat to the pan. Stir in 2 cups of the tomato sauce and simmer for 2 minutes.
In a medium bowl combine the ricotta cheese, spinach, egg, the salt, the pepper and nutmeg.
Spread 1 cup of tomato sauce on the bottom of a 9 by 13 inch baking dish. Place a layer of lasagna noodles on top, touching but not overlapping. Spread half of the ricotta mixture on top of the noodles. Add another layer of noodles. Top with half the beef-mushroom mixture. Repeat with another layer of noodles, then remaining cheese mixture, more noodles, then remaining beef mixture and finally 1 more layer of noodles. Top the final layer of noodles with the remaining sauce, then sprinkle with the grated cheeses. Cover loosely with foil and bake for 45 minutes. Uncover and bake for 15 minutes more.
Monday, March 29, 2010
Homemade Cinnamon Sugar Pita Chips
Yes, it's been forever. Sorry! I kept saying I would post up a bunch more recipes, but then I got really busy and went away this weekend so it turned into zero time to post or even bake for that matter. Thanks for your patience! Back to cooking...
Wow, I've been saying I'd post this for so long now I don't even remember what song I listened to when I made this. I think I was listening to the Sookie Stackhouse book on CD.
Anyway, this recipe is super easy and it's so nice that you have more control over the foods in your life. I made these with organic white wheat and corn tortillas I bought at Trader Joe's. One thing's for sure, these are better for you and have no preservatives because I left a few tortillas and they went bad within the week when I left them out. The weather was pretty cool that week too.
I changed the recipe by adding in some nutmeg along with the cinnamon and sugar. Actually, to be honest, I think I added too much, so I'll have to dial that down next time. The baking time is off too. I just baked it til the chips started to curl. I felt like that was a better indicator.
These turned out delicious and really were quite easy. Oh! And Today, I have my own pics! So all the pictures below were from my point and shoot. Enjoy!
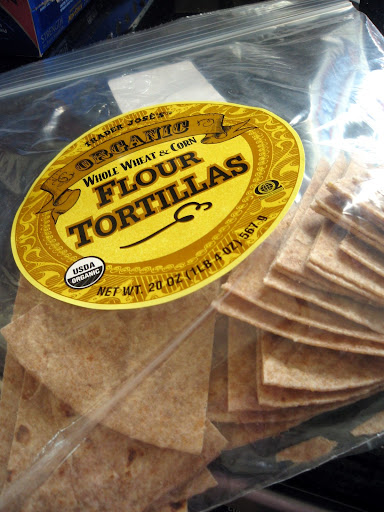
The package of delicious tortillas I used, cut into slices.

The finished product in all its glory! Yum!
4 out of 5 stars!
________________
Recipe from here.
Wow, I've been saying I'd post this for so long now I don't even remember what song I listened to when I made this. I think I was listening to the Sookie Stackhouse book on CD.
Anyway, this recipe is super easy and it's so nice that you have more control over the foods in your life. I made these with organic white wheat and corn tortillas I bought at Trader Joe's. One thing's for sure, these are better for you and have no preservatives because I left a few tortillas and they went bad within the week when I left them out. The weather was pretty cool that week too.
I changed the recipe by adding in some nutmeg along with the cinnamon and sugar. Actually, to be honest, I think I added too much, so I'll have to dial that down next time. The baking time is off too. I just baked it til the chips started to curl. I felt like that was a better indicator.
These turned out delicious and really were quite easy. Oh! And Today, I have my own pics! So all the pictures below were from my point and shoot. Enjoy!
The package of delicious tortillas I used, cut into slices.
The finished product in all its glory! Yum!
4 out of 5 stars!
________________
Recipe from here.
Ingredients
- 10-12 flour tortillas
- vegetable oil (or spray)
- spices
Directions
- Cut tortillas into 8 wedges.
- Brush or spray baking sheet with oil.
- Arrange tortilla wedges in a single layer on the baking sheet and brush or spray lightly with oil.
- Sprinkle with seasonings: salt or seasoned salt, chili powder, cinnamon sugar, etc.
- Bake at 325 until crisp and lightly browned, approximately 10 minutes.
Monday, March 22, 2010
Matcha Cupcakes (aka Green Tea Cupcakes)
Cooking Song: "California Love" - Tupac
Yes, that's right. We listened to gangsta rap while baking. That's how I roll.
First of all, I should start off by saying what we made looks nothing like the pictures below. Stupid me forgot to take pictures of it, I really should have. I made these with my friend M last week and had quite an adventure.
We started off having problems at the very beginning because beating butter and sugar together with a hand mixer, and not a great hand mixer, is hard to begin with. Oops, ended that sentence with a preposition, oh well. Butter and sugar pieces get all over the place and then add to that the fact that we were mixing in a shallow bowl---yea, okay, you get the picture. We decided to prematurely add in the eggs because we figured a little liquid would help the process. To a certain extent, we were right. It did help, but it was still annoying and piece-y. I added in the flour mixture a portion at a time because the mixture became so thick it was difficult to mix. Even if I had a better hand mixer the mixture was still extremely difficult to work with. Obviously this made filling the baking tin a lengthy process, in and of itself. The batter was simply an unwieldy batter which seemed to resent being handled.
This recipe actually only turned out about 18 cupcakes. Maybe we made them too big? M had a nice baking tray that were upside down rose shapes and those turned out beautiful, even though I've yet to see a green rose. They were a beautiful light golden brown...green. :)
Even though these looked quite interesting, they tasted wonderful, however nothing like cupcakes. They were more scone in consistency and that may have been in part to the fact that we didn't spoon flour into the measuring cup as is the standard. But still, three cups of flour is quite a lot. I was also surprised at the large quantity of sugar as well (not to mention butter), but we imagined it had to do with balancing out the natural bitterness of the Matcha. I've never thought to cook with Matcha Tea so this was an entirely new and fun experience for me.
We didn't even bother making the frosting, the scone-cupcakes were sweet enough on their own, and too dense anyway to be cupcakes. It really just wasn't necessary.
With that said, I would not make this again. The batter was maddeningly thick and annoying to handle. The sheer quantity of butter, flour, and sugar in this recipe was also a little too much for me. But overall, it did taste quite good.
4 stars out of 5 (docked for annoying batter-ness).
_____________________________
Below from here.

Matcha Cupcakes
from Cupcake Bake Shop by Chockolyt
Matcha Green Tea Cupcakes
* 24 cupcake papers or 1/2 sheet pan / 350 degree oven
* 1 cup (2 sticks) unsalted butter, room temperature
* 2 cups sugar
* 2 large eggs
* 2 large egg yolks
* 3 cups all-purpose flour
* 2 teaspoons baking powder
* 1/8 teaspoon salt
* 1 cup milk
* 2 tablespoons matcha tea
For Cupcakes
* Beat butter on high until soft, about 30 seconds.
* Add sugar. Beat on medium-high until light and fluffy, about 3 minutes.
* Add eggs/egg yolks one at a time, beat for 30 seconds between each.
* Whisk together flour, baking powder, and salt in a bowl. Add to batter and mix to combine.
* Mix matcha in with the milk. Add to the batter and mix until combine.
* Scoop batter into prepared into cupcake papers.
* Bake for 22-25 minutes until a cake tester comes out clean.
Yes, that's right. We listened to gangsta rap while baking. That's how I roll.
First of all, I should start off by saying what we made looks nothing like the pictures below. Stupid me forgot to take pictures of it, I really should have. I made these with my friend M last week and had quite an adventure.
We started off having problems at the very beginning because beating butter and sugar together with a hand mixer, and not a great hand mixer, is hard to begin with. Oops, ended that sentence with a preposition, oh well. Butter and sugar pieces get all over the place and then add to that the fact that we were mixing in a shallow bowl---yea, okay, you get the picture. We decided to prematurely add in the eggs because we figured a little liquid would help the process. To a certain extent, we were right. It did help, but it was still annoying and piece-y. I added in the flour mixture a portion at a time because the mixture became so thick it was difficult to mix. Even if I had a better hand mixer the mixture was still extremely difficult to work with. Obviously this made filling the baking tin a lengthy process, in and of itself. The batter was simply an unwieldy batter which seemed to resent being handled.
This recipe actually only turned out about 18 cupcakes. Maybe we made them too big? M had a nice baking tray that were upside down rose shapes and those turned out beautiful, even though I've yet to see a green rose. They were a beautiful light golden brown...green. :)
Even though these looked quite interesting, they tasted wonderful, however nothing like cupcakes. They were more scone in consistency and that may have been in part to the fact that we didn't spoon flour into the measuring cup as is the standard. But still, three cups of flour is quite a lot. I was also surprised at the large quantity of sugar as well (not to mention butter), but we imagined it had to do with balancing out the natural bitterness of the Matcha. I've never thought to cook with Matcha Tea so this was an entirely new and fun experience for me.
We didn't even bother making the frosting, the scone-cupcakes were sweet enough on their own, and too dense anyway to be cupcakes. It really just wasn't necessary.
With that said, I would not make this again. The batter was maddeningly thick and annoying to handle. The sheer quantity of butter, flour, and sugar in this recipe was also a little too much for me. But overall, it did taste quite good.
4 stars out of 5 (docked for annoying batter-ness).
_____________________________
Below from here.
Matcha Cupcakes
from Cupcake Bake Shop by Chockolyt
Matcha Green Tea Cupcakes
* 24 cupcake papers or 1/2 sheet pan / 350 degree oven
* 1 cup (2 sticks) unsalted butter, room temperature
* 2 cups sugar
* 2 large eggs
* 2 large egg yolks
* 3 cups all-purpose flour
* 2 teaspoons baking powder
* 1/8 teaspoon salt
* 1 cup milk
* 2 tablespoons matcha tea
For Cupcakes
* Beat butter on high until soft, about 30 seconds.
* Add sugar. Beat on medium-high until light and fluffy, about 3 minutes.
* Add eggs/egg yolks one at a time, beat for 30 seconds between each.
* Whisk together flour, baking powder, and salt in a bowl. Add to batter and mix to combine.
* Mix matcha in with the milk. Add to the batter and mix until combine.
* Scoop batter into prepared into cupcake papers.
* Bake for 22-25 minutes until a cake tester comes out clean.
Tuesday, March 16, 2010
Carrot Cake Cupcakes with Cinnamon Cream Cheese Frosting
*UPDATED 3/29/10*
My uploaded picture! This is why you need cupcake carriers--so you don't go ghetto by putting a few in each tupperware and then have the foil smear the frosting all over!
*END*
__________________________
Recipe Song: Silence.
Thought I would try something new, and the silence was relaxing in its own right.
Continuing my crazy cooking Thursday, I made these absolutely delicious cupcakes on Friday for my mom's birthday. She absolutely loves carrot cake, so I thought it would be fun to make cupcakes for her and her coworkers.
This is actually a really simple recipe. From start to finish, it took me less than 2 hours, including baking, making the frosting, and clean up. In my book, that's fast. I know I'm definitely not the fastest baker/cook so adjust your prep and bake times accordingly. I bought pre-grated carrots just to make my life easier and then blended them in a blender to make them finer. I don't like eating carrot cake where little bits and strings of carrots come out when you bit into the cake. I did use walnuts as well and blended those into smaller pieces as well. When you don't have a food processor, the blender is a handy tool to have indeed.
Other changes I made to the recipe are as follows: I used Greek strained plain low fat yogurt as opposed to regular low fat yogurt, Fage to be specific. It's my favorite plain yogurt brand. I didn't taste the sourness at all in the end product, so I don't think it makes any difference. I actually made this recipe again on Monday and used a different brand of low fat plain yogurt and it tasted the same. I also primarily bake with salted butter and then don't add the additional salt the recipe calls for (one of my girlfriends, Annie, taught me that one).
For the frosting, I used 1/3 less fat cream cheese and went crazy and did the 1/2 tsp cinnamon. The frosting is so good, I really could have just eaten it plain with no cupcakes. Finger-lickin', indeed. I tried to pipe my frosting out of my own makeshift sandwich bag turned piping bag but I miscalculated the hole I cut and it ended up too big. That was an interesting experience, lol.
The most important thing to pay attention to in this recipe is that it makes a perfect 12 cupcakes. I don't know why the recipe says it makes 18, but I, as well as many other of the commenters, had a different experience. But as I said, absolutely delicious! Huge hit. Happy eating!
5 out of 5 stars!
______________________________
Below from here:
Carrot Cupcakes with Cinnamon Cream Cheese Frosting
Prep Time: 30 Minutes
Cook Time: 25 Minutes
Servings: 18
Difficulty: Easy
Ingredients
- 1-½ cup All-purpose Flour, Spooned And Leveled
- 1 teaspoon Baking Powder
- ½ teaspoons Baking Soda
- ¾ teaspoons Salt
- ½ teaspoons Ground Cinnamon
- ¼ teaspoons Ground Ginger
- ¼ teaspoons Ground Nutmeg
- ¾ cups (1 ½ Sticks) Unsalted Butter, Melted
- 1 cup Packed Light Brown Sugar
- 1 whole Large Egg
- 2 Tablespoons Lowfat Plain Yogurt
- ½ teaspoons Vanilla Extract
- 1-½ cup Grated Carrots (about 3 Or 4 Medium Carrots)
- ¼ cups Diced Walnuts (optional)
Cinnamon Cream Cheese Frosting - 8 ounces, weight Organic Neufchatel Cheese, Room Temperature
- ¼ cups (1/2 Stick) Unsalted Butter, Room Temperature
- 1 cup Confectioners’ Sugar
- 1-½ teaspoon Vanilla Extract
- ¼ teaspoons Or 1/2 Teaspoon Ground Cinnamon
Preparation Instructions
Cupcakes:
Preheat oven to 375 degrees. Line a 12-cup standard muffin tin with paper liners.
In a large bowl, whisk together flour, baking powder, baking soda, salt, cinnamon, ginger and nutmeg; set aside.
In another large bowl, whisk together melted butter, brown sugar, egg, yogurt, and vanilla. Stir in carrots and walnuts (if using). Gradually add dry ingredients to the butter mixture until well combined. Divide among muffin tin. Bake for 25 minutes, rotating pan halfway through until a toothpick inserted in the center comes out clean.
Let cool on a wire rack in the pan for 5 minutes. Then remove from the pan to a wire rack to cool completely before frosting.
Cinnamon Cream Cheese Frosting:
Using an electric mixer, beat cream cheese, butter, and confectioners’ sugar until smooth; beat in vanilla and cinnamon. Top each cupcake with 2 tablespoons of frosting and spread to cover. You can also pipe the frosting onto the tops of the cupcakes.
Monday, March 15, 2010
Low Fat Spinach Artichoke Dip
*UPDATED 3/29/10*

Sorry for the ugly picture. I hate using flash, but it was necessary this time around. It looks a lot less runny than the recipe's picture because I used more cream cheese. At least...I think that's why. :)
*END*
__________________________
Recipe Song: Dead and Gone, audiobook by Charlaine Harris.
As part of my crazy cooking Thursday last week (I made this, the momofuku cookies from yesterday's post, as well as something else I'll post about later), I made this lovely spinach artichoke dip. Yea, the picture below isn't so appetizing, but I haven't uploaded any of my pictures from my lovely cooking last week, so you'll have to contend with that. Sorry! Muahaha.
Anyway, I had an interesting issue with this recipe. As you notice, it calls for low fat and fat free cream cheese. Well, after going to a few different grocery stores, none of which carries fat free cream cheese, I found out that hey, there's no fat free cream cheese. So I used all 1/3 less fat cream cheese and stupidly, none of those packages comes in a 6 ounce size, which angered me to say the least. It reminded me of the nonsensical way hot dogs and buns are sold. I don't eat cream cheese at home, so I just figured I'd use both blocks of cream cheese, regardless of what the recipe said.
Dang, I'm glad I wasn't baking. Cuz that wouldn't fly if I were.
So, the deal with adding more cream cheese is that I must now in turn add more of other things like sour cream and mozzarella and then---yea, I didn't. I think that was one downfall of the finished product. It was cream cheese taste heavy. So that was unfortunate. However, when it was all heated up thoroughly, it was really quite delicious. The dip is so creamy you'd never know you were missing so much fat, except that there is no unappetizing layer of oil sitting on top.
Another thing, I actually tore up the spinach and pulled all out the stems of every leaf. Huge waste of time. Next time I think I'll lightly chiffonade the spinach so I don't waste so much time hand tearing. This recipe makes a lot, so if there's only a few of you, think about cutting it in half or so.
Overall, delicious. Add some pita, chips, or bread and you're good to go.
4 out of 5 stars.
____________________________
Below from here.

Spinach and Artichoke Dip
- makes about 10 servings of about 1/2 cup each -
Adapted from Cooking Light.
Ingredients
10-ounce bag fresh spinach
6 ounces (3/4 block) 1/3-less-fat cream cheese, softened
6 ounces (3/4 block) fat-free cream cheese, softened
1/2 cup fat-free sour cream
1 1/2 cups part-skim mozzarella, shredded
1 (14-ounce) can artichoke hearts, drained and chopped
1/4 teaspoon freshly ground black pepper
3 garlic cloves, crushed (not minced)
6 tablespoons shredded parmesan cheese, divided
Procedure
1. Preheat oven to 350°F.
2. Tear spinach into bite-size pieces, removing any thick stems. Rinse in a colander, leaving a little water on the leaves. In a large nonstick skillet or Dutch oven, sauté the spinach over medium heat until wilted. Drain in the colander, pushing a little of the extra water out.
3. In a large mixing bowl, combine the cream cheeses with a potato masher. Add sour cream and mash more. Add spinach, mozzarella, artichokes, pepper, garlic, and 2 tablespoons of the parmesan. Stir everything until thoroughly combined.
4. Pour mixture into a 1 1/2 quart baking dish. Sprinkle remaining 1/4 cup of Parmesan on top. Bake 30 minutes, or until parmesan is melted dip is all bubbly. Remove from oven and give it a minute or two to cool down. Serve with baked tortilla chips to applause.
Sunday, March 14, 2010
The Momofuku Milk Bar Compost Cookie
*UPDATED 3/29/10*
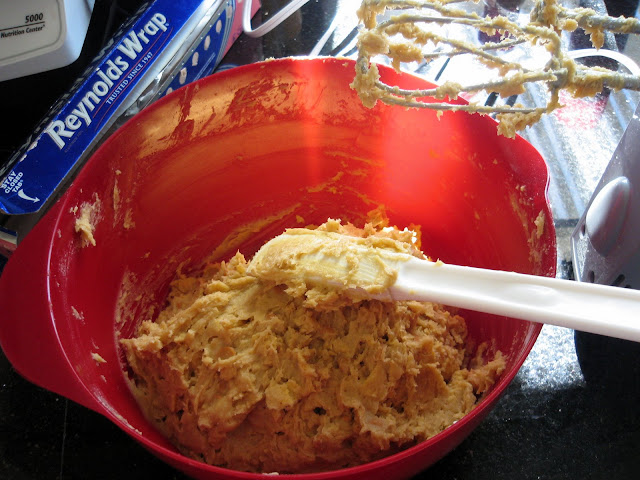
The crazy, messy batter. I hate trying to cream butter and sugar without a paddle attachment! BOOO.
The crazy, messy batter. I hate trying to cream butter and sugar without a paddle attachment! BOOO.

Ugh, my burned cookies before I used the cookie cutters to cut out the unburned centers. Good grief.
*END*
___________________________
Recipe Song: None. I listened to the latest installment of the Sookie Stackhouse mysteries on CD :) Dead and Gone by Charlaine Harris. Pretty good idea, except when I washed dishes or blended things and couldn't hear it anymore. But that's what the rewind button is for, right?
So I was crazy enough to try this recipe. I say crazy because I don't have a stand mixer so I had no paddle attachment to make this. However, I didn't realize that til after I started mixing with my hand mixer and was trying to figure out why it wouldn't mix well and kept spattering all over.
Huh. No wonder they always tell you to recipe through your recipe thoroughly before you attempt it.
Anyways, that combined with an error with the baking temperature, and distractions in the form of a telephone call resulted in not so great cookies. I once again cooked using the convection oven which kinda screwed things up because I entered 400 degrees, and my oven usually converts it to the proper temp for convection oven baking. But for some reason, this time, it stayed at the temp entered and I ended up burning my cookies. I also forgot to check on them part way through because I got caught on the phone and I totally forgot about my cookies. Totally my bad. Needless to say, these didn't turn out at all like the ones pictured. Even after refrigerating the dough for almost 3 hours, they spread so thinly that it turned into one big cookie sheet with dented lines where the spaces between used to be. One sheet was so browned around the edges due to uneven cooking at too high a temperature, that I resorted to using two different sized cookie cutters to cut out the non-burnt centers and tossed the outer edges.
I must say, even tho one entire sheet was burned (even the bottoms), they were miraculously still pretty decent tasting. I was adventurous and used tortilla chip pieces and butterscotch morsels. Interesting combination? I think so! It gave a nice sweet-savory contrasting taste.
I don't know if I'll be making this again because it made a fair mess with only satisfactory results. Maybe I'll try it again when I have a paddle attachment. But until then...no thanks. :) I took pictures of my mishap, but now I'm a tad embarrassed to post them. Maybe one day. But until then, the nice poster of the website I took this from posted more than enough detailed pics of all his steps and that'll help you should you decide to make them as well. Happy baking!
3.5 out of 5 stars (but I would say that's due to my many errors...kitchen adventures indeed.)
__________________________________________
Below from here.
The Momofuku Milk Bar Compost Cookie
recipe by Christina Tosi
(Courtesy of Regis & Kelly's website)
Ingredients:
1 cup butter (that's two sticks, unsalted)
1 cup granulated sugar
3/4 cup light brown sugar
1 Tbsp corn syrup [Note: I left this out; not because I'm against corn syrup, I just didn't have it. The cookies came out fine, though may have had a nicer sheen with the syrup.]
1 tsp vanilla extract
2 large eggs
1 3/4 cups all purpose flour
2 tsps baking powder
1 tsp baking soda
2 tsps Kosher salt
1 1/2 cups your favorite baking ingredients (options: chocolate chips, Raisenettes, Rollos, Cocoa Krispies)
1 1/2 cups your favorite snack foods (chips, pretzels, etc.)
Note: as said above, I used chopped up bittersweet chocolate and crushed pretzels. Next time I'd definitely add potato chips.
1. In a stand mixer with the paddle attachment, cream butter, sugars and corn syrup on medium high for two to three minutes until fluffy and pale yellow in color. Scrape down the sides with a spatula.
2. On a lower speed, add eggs and vanilla to incorporate.
Increase mixing speed to medium-high and start a timer for 10 minutes. During this time the sugar granules will fully dissolve, the mixture will become an almost pale white color and your creamed mixture will double in size.
3. When time is up, on a lower speed, add the flour, baking powder, baking soda and salt.
Mix 45 - 60 seconds just until your dough comes together and all remnants of dry ingredients have incorporated. Do not walk away from your mixer during this time or you will risk over mixing the dough. Scrape down the sides of the mixing bowl with a spatula.
4. On the same low speed, add in the hodgepodge of your favorite baking ingredients and mix for 30 - 45 seconds until they evenly mix into the dough. Add in your favorite snack foods last, paddling again on low speed until they are just incorporated.
5. Using a 6 oz. ice cream scoop (I'm not sure how many ounces mine is, but it worked well), portion cookie dough onto a parchment lined sheetpan.
6. Wrap scooped cookie dough tightly with plastic wrap and refrigerate for a minimum of one hour or up to 1 week.
DO NOT BAKE your cookies from room temperature or they will not hold their shape.
7. Heat the oven to 400 F. Take the plastic off your cookies and bake 9 to 11 minutes. While in the oven, the cookies will puff, crackle and spread.
At 9 minutes, the cookies should be browned on the edges and just beginning to brown towards the center. Leave the cookies in the oven for the additional minutes if these colors don't match up and your cookies still seem pale and doughy on the surface.
8. Cool the cookies completely on the sheet pan (good luck!) before transferring to a plate or an airtight container or tin for storage. At room temp, they'll keep five days.
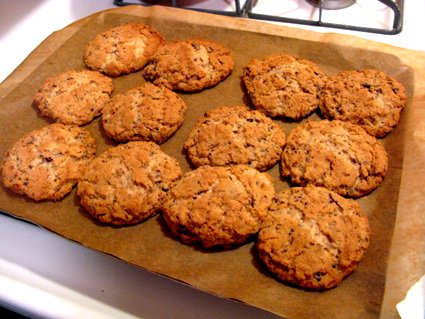
Subscribe to:
Posts (Atom)